
Tuesday JS visual novel engine
Creation html apk for android
Thanks to the WebView component, which is included with operating systems, you can create your own application for a desktop computer or mobile device using html css javascript. This method has its pros and cons. It is in many ways more efficient than using cross-platform systems such as QT, but significantly inferior to classic application creation using the platform SDK.
Now there are many frameworks for creating applications like PhoneGap, Flutter, recently Ionic has gained great popularity. I'll show you how to use Cordova because I've used it most often and I'm familiar with it.
This guide does not require programming knowledge or special skills and is suitable not only for Tuesday JS but also for other engines using html like Construct 2 or GDevelop.
To begin with, I will tell you how to make an apk for Android because it is much easier than for iOS and does not require macOS.
Step 1
install npm https://www.npmjs.com/get-npm
Android studio https://developer.android.com/studio
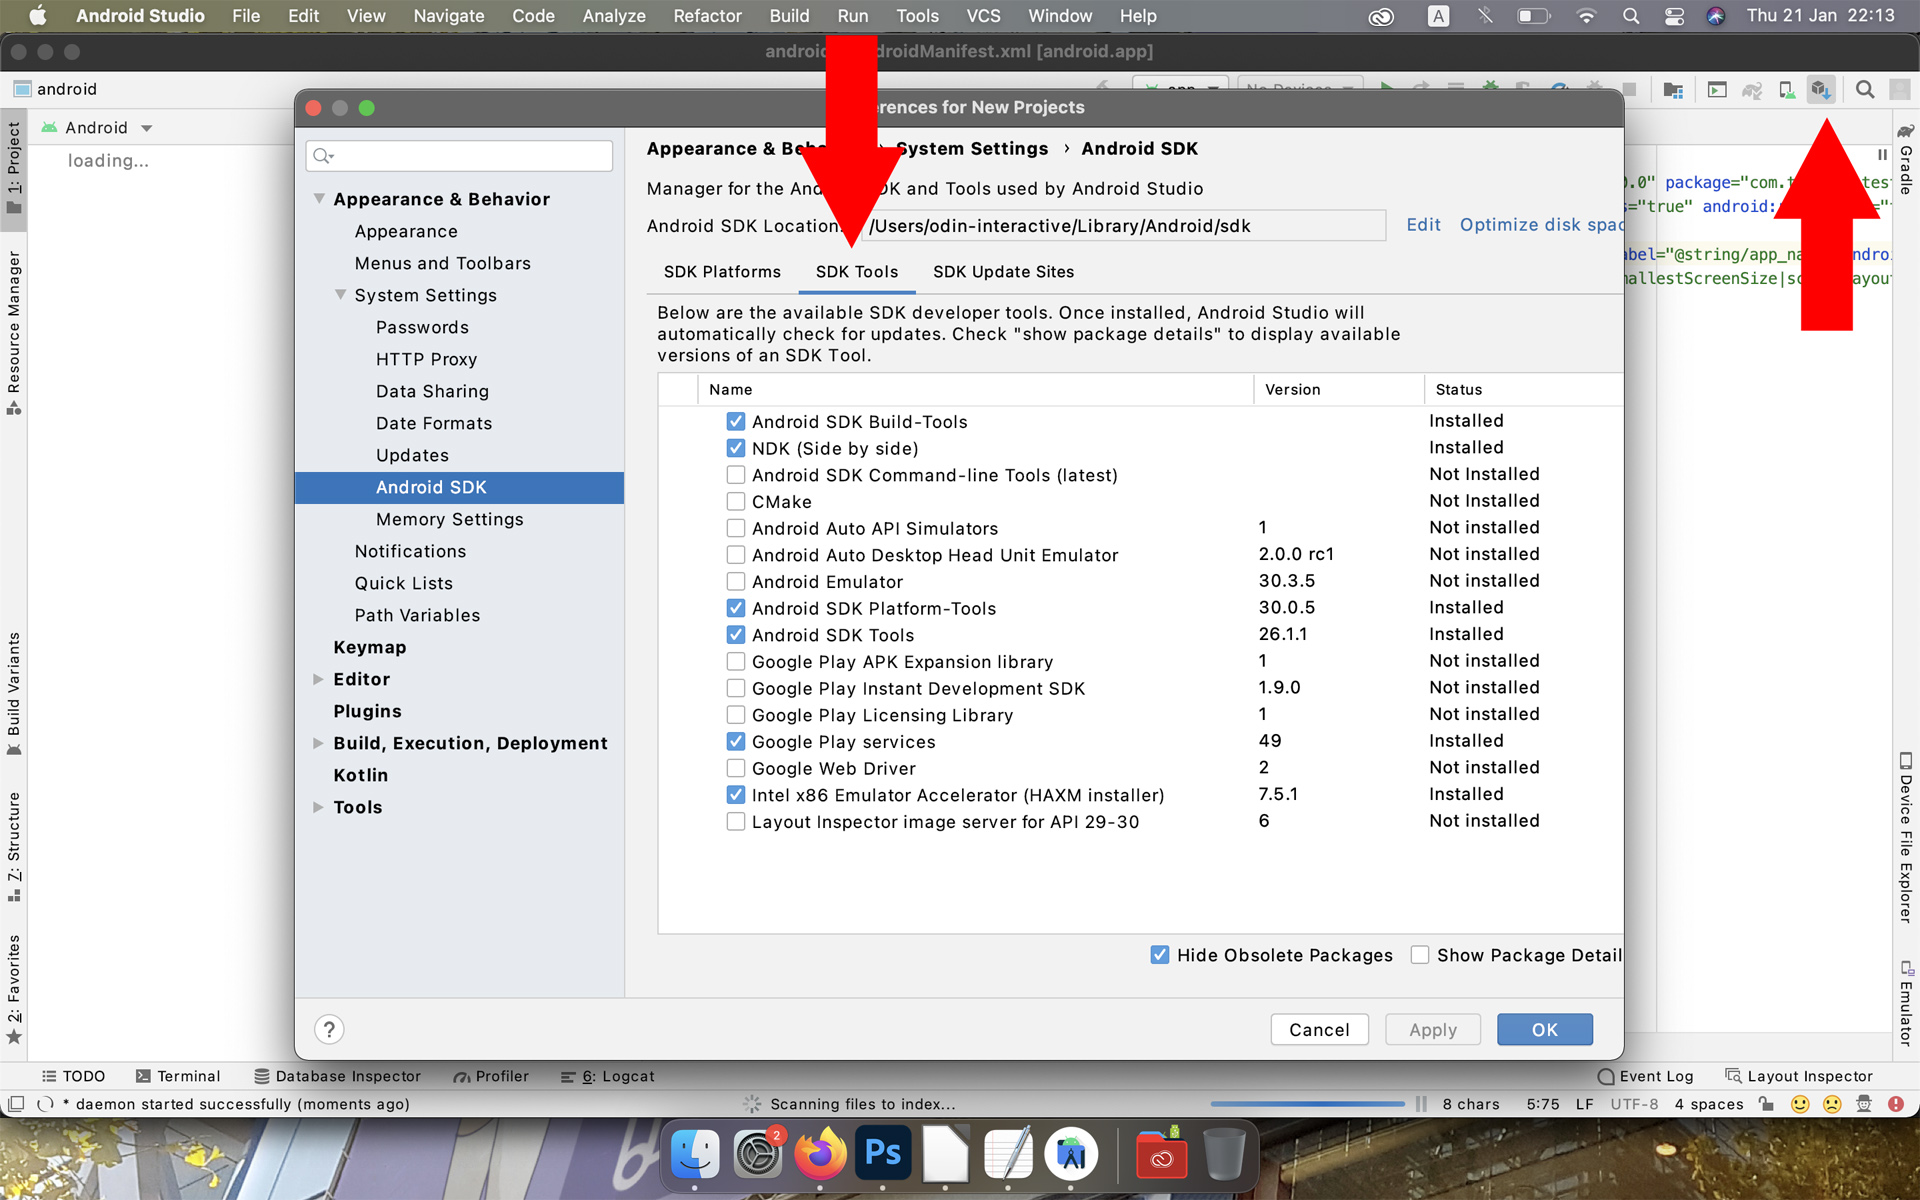
Once installed, it is very important to run it so that it downloads everything you need, like Java jdk and Androdi sdk with all components.
Android studio must have these components.
Step 2 Launch Terminal
For Windows - Press the keyboard shortcut WIN + R, type cmd and click OK.
For macOS - Go to Applications / Utilities and launch Terminal.
In the case of MacOS, if the commands entered give errors, then most likely you will have to use superuser rights. Write "sudo" before each command. With Windows, this shouldn't be a problem.
Step 3 Install cordova, enter the command:
npm install -g cordova
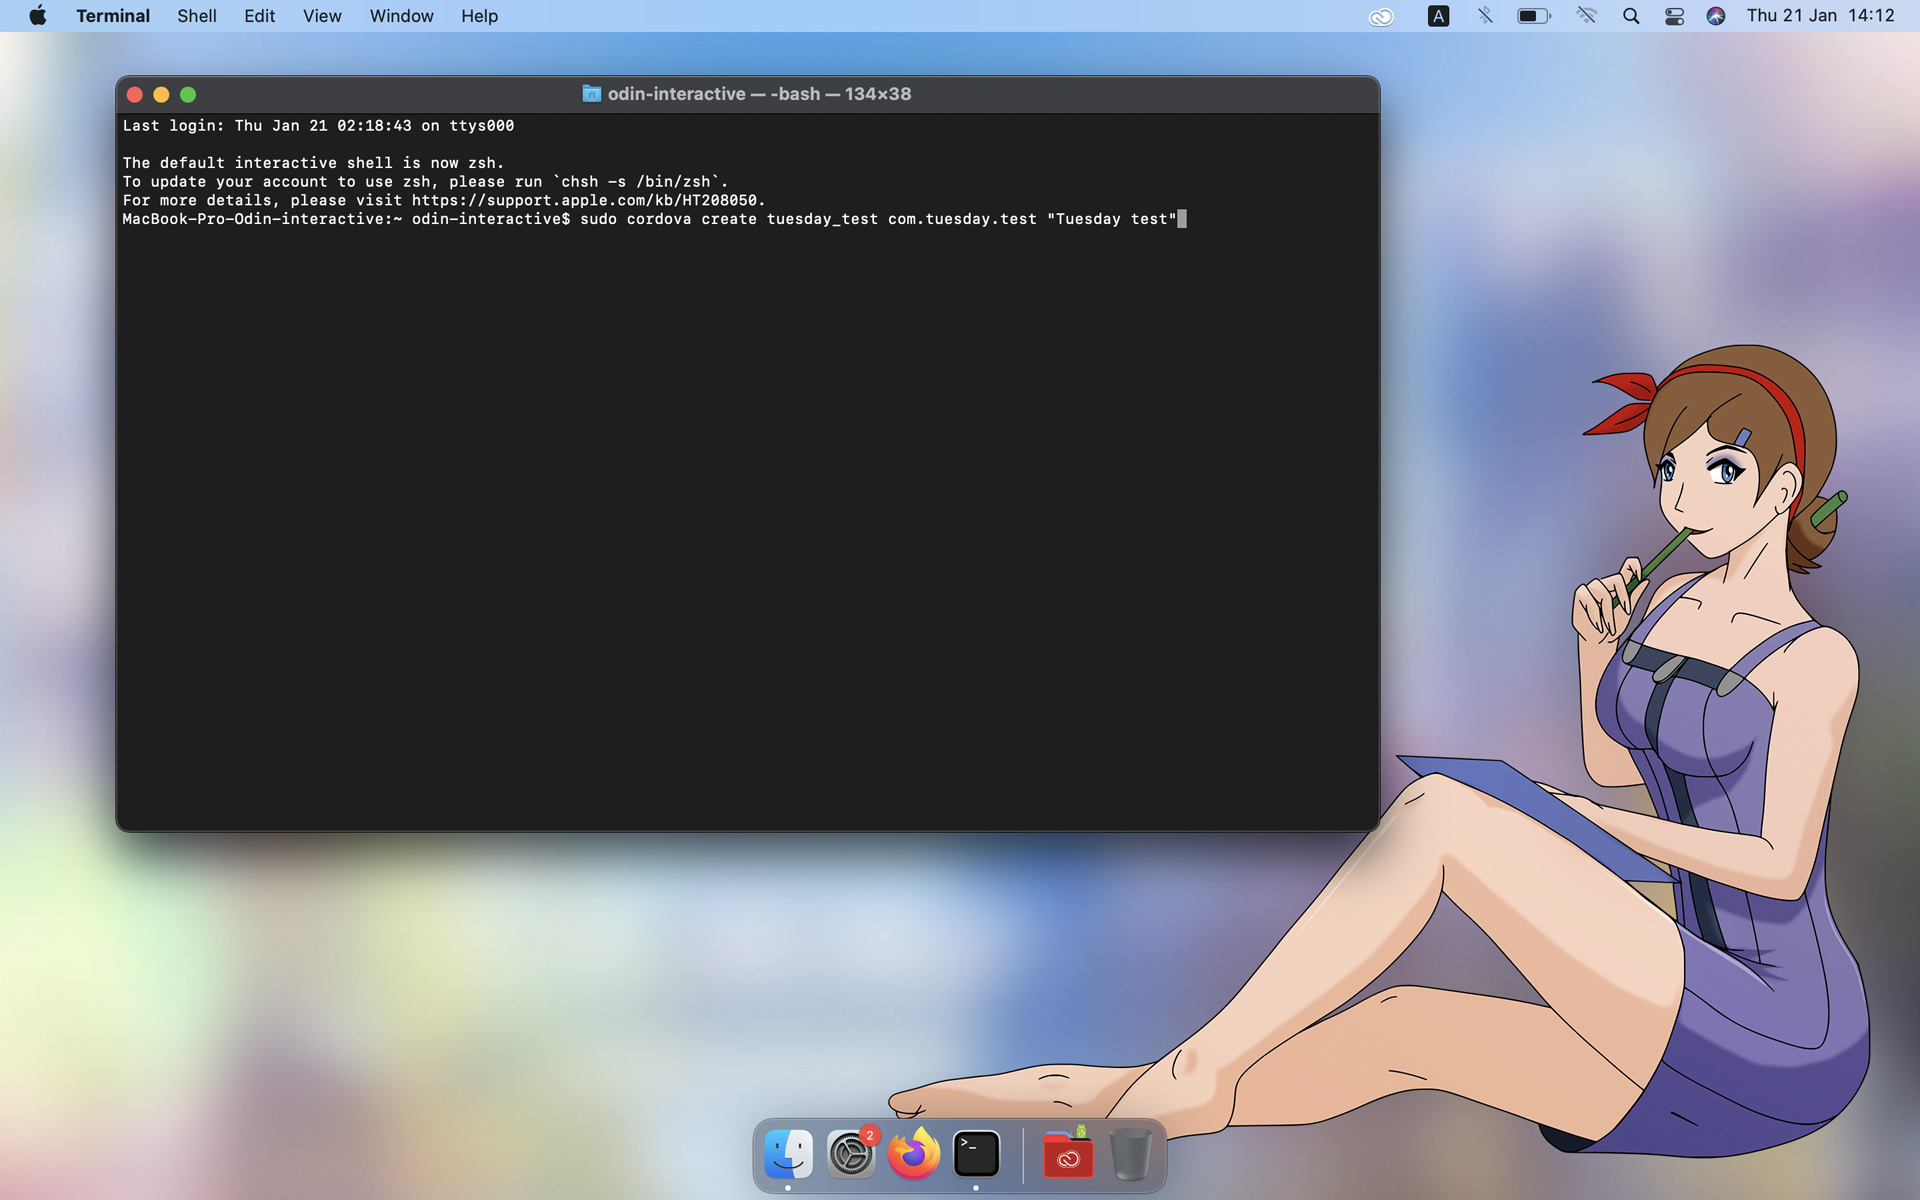
Step 4 Now we are ready to create the application, enter the command:
cordova create tuesday_test com.tuesday.test "Tuesday test"
cordova create "folder name" "package name or id" "project name"
Apple and Google recommend using the reverse domain com.game.visualnovel as the package name
"application language or distribution domain". "organization name or creator name". "project name"
the package name must be unique for each project, if this package name is already taken in GooglePlay or AppStore, then you will not be able to download another application with the same name.
Step 5 Go to the project folder with the command
cd tuesday_test
now we can add the Android platform using the command
cordova platform add android
and all the necessary plugins in this case are enough 2
cordova plugin add cordova-plugin-media
cordova plugin add cordova-plugin-splashscreen
Cordova has a variety of plugins for every occasion. For more information on how to create a Cordova project, see the Official Create Your First Cordova Application tutorial.https://cordova.apache.org/docs/en/latest/guide/cli/
Step 6 The project is created in the user's root folder on both Windows and MacOS.
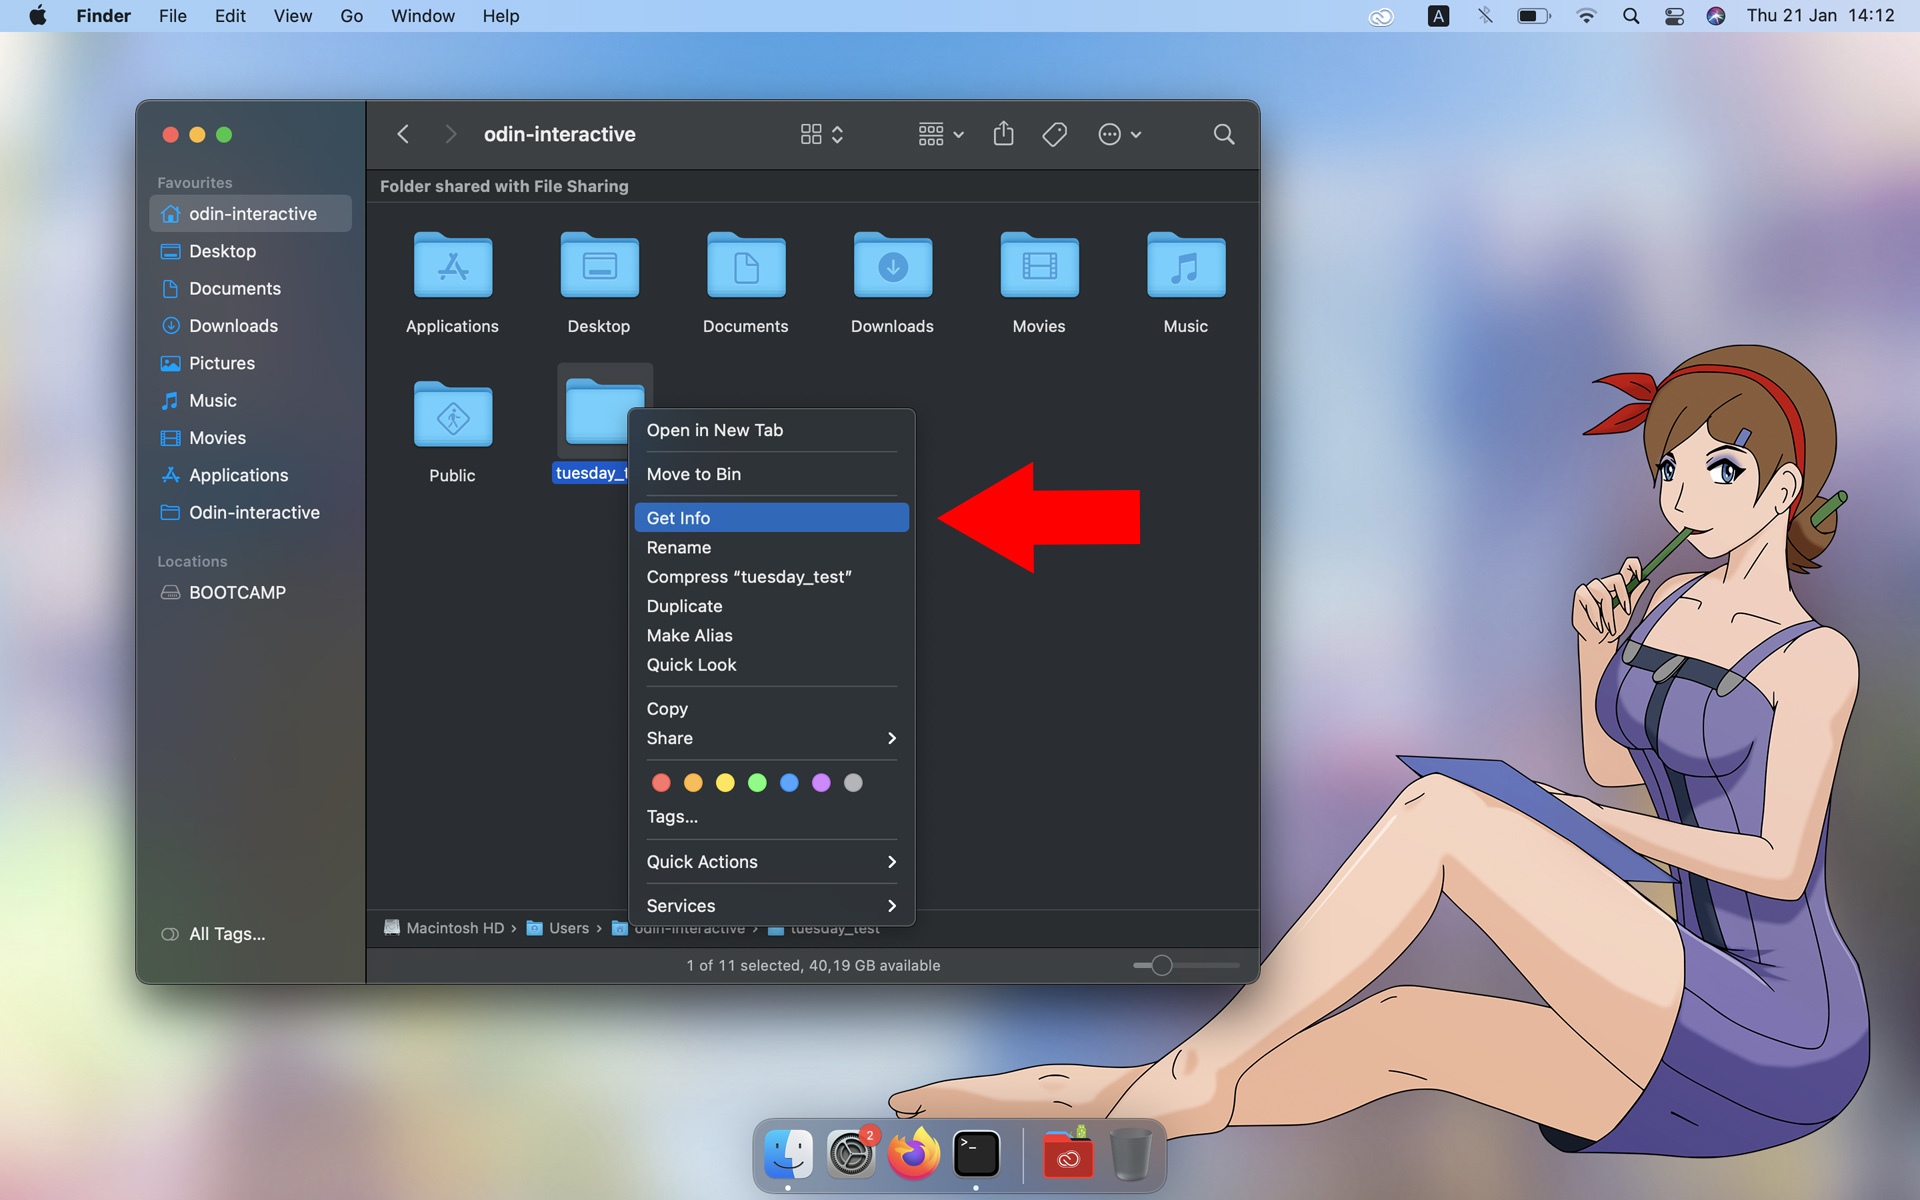
On macOS, you need to grant read / write access to all user groups so that Android studio can make changes to it, otherwise Android studio will throw an error.

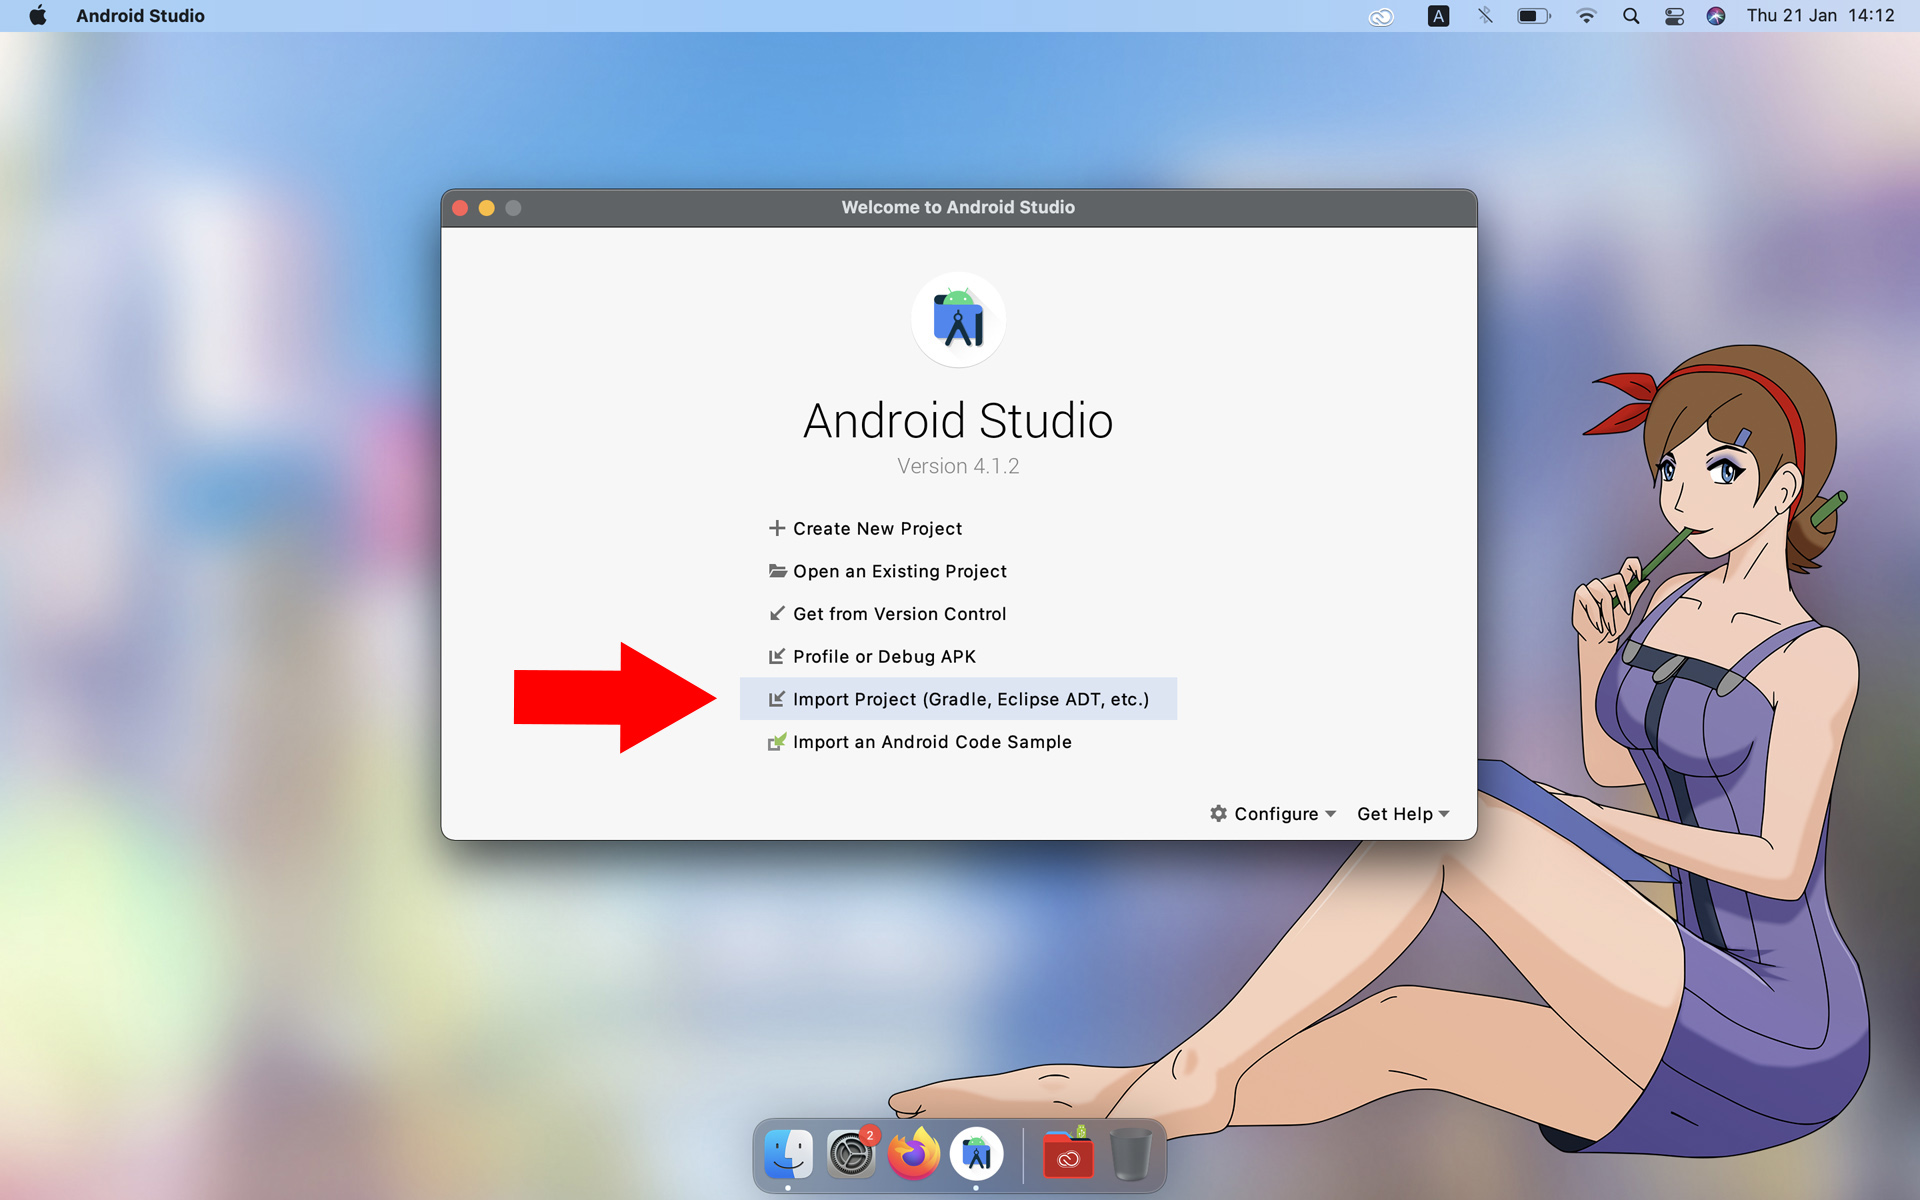
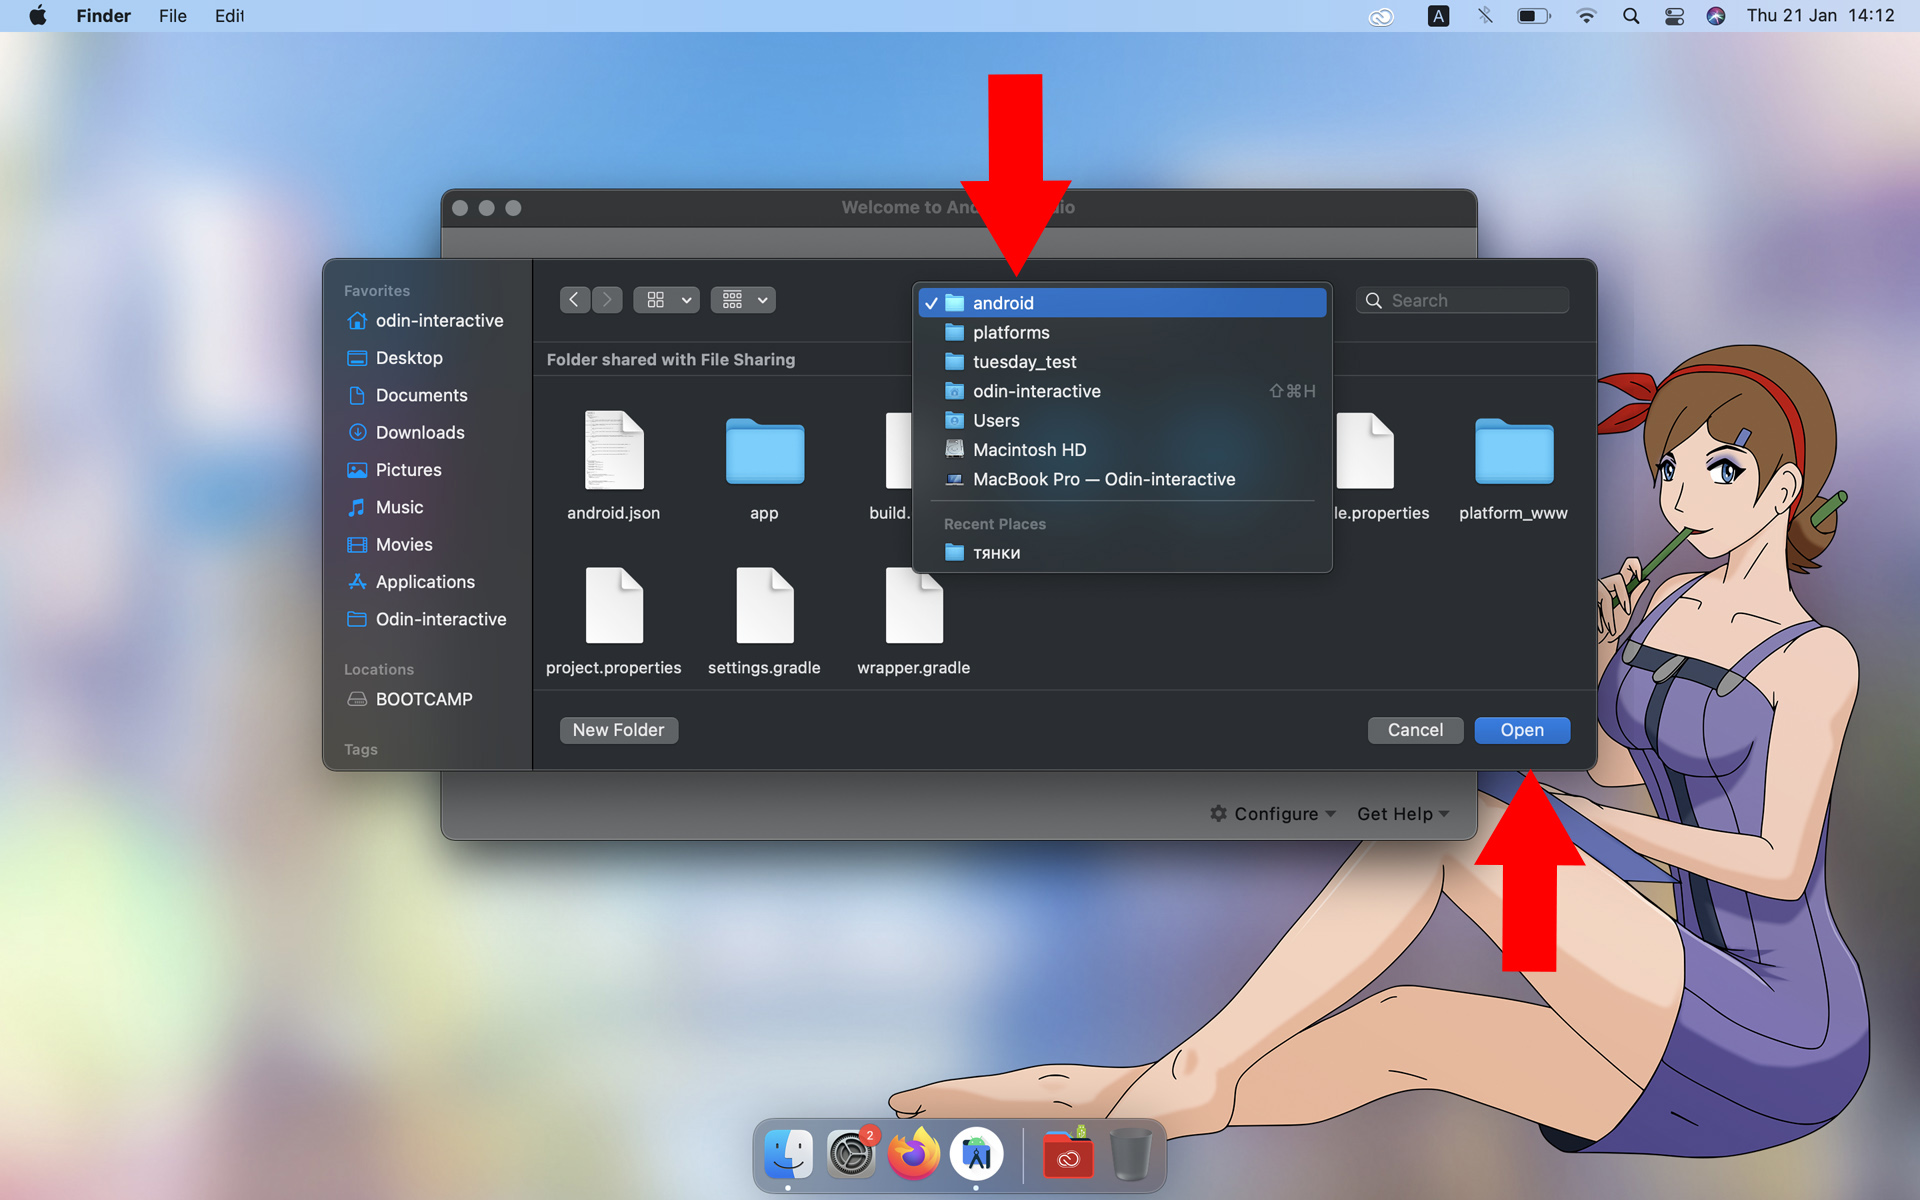
Step 7 Start Android studio and open the project via an import project (gradle, eclipse, ADT, etc.)
the project will be located in the project/platform/android then click ok
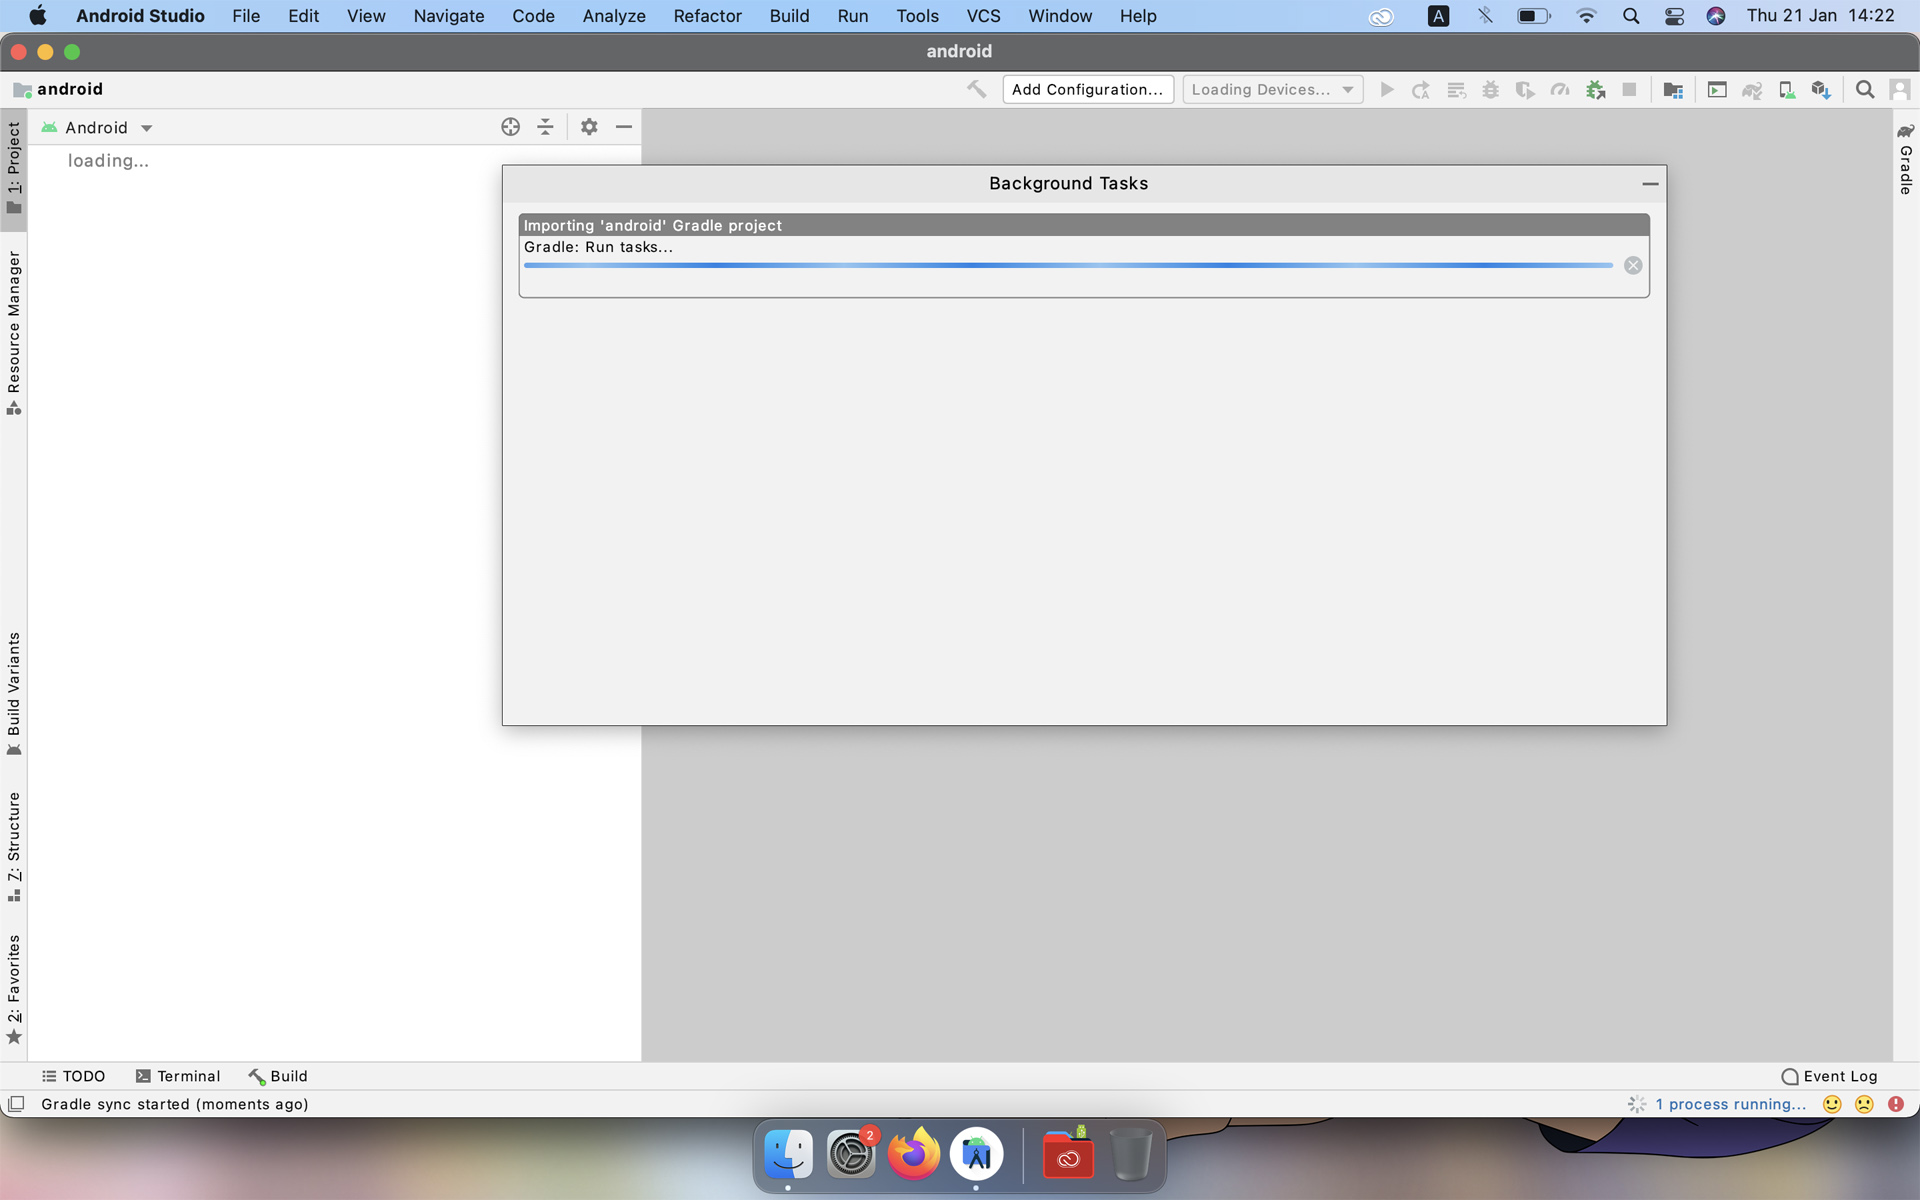
And here the fun begins. There might be a gradle issue and android studio will throw an error. This is most often caused by android studio running offline and unable to download the correct gradle version. Try turning offline mode off and importing the project again.
It happens that gradle does not load until the end or Android studio cannot recognize it, in which case you will have to look for a solution to the problem yourself, since its solution often depends on the version of Android studio.
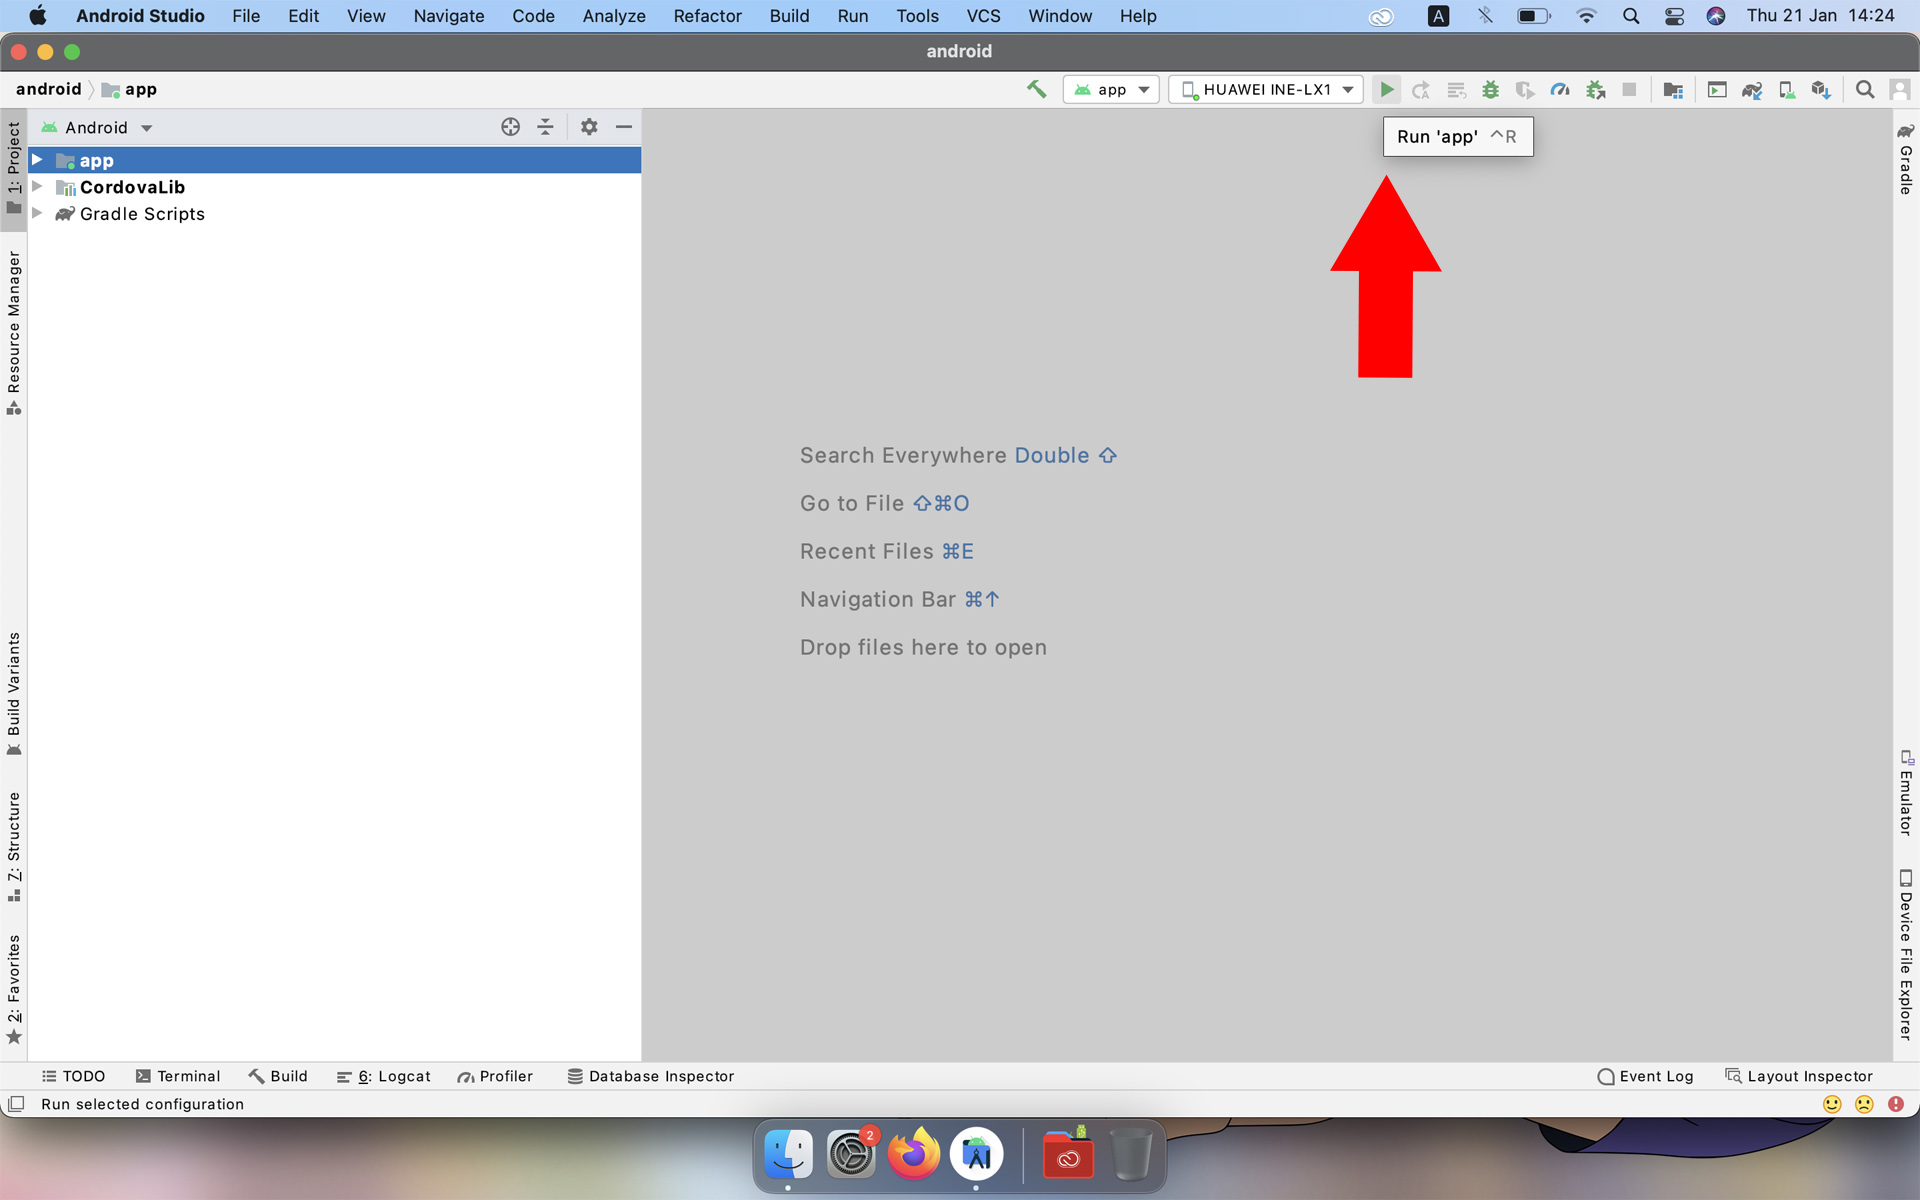
To run a project on a device, you need to enable developer mode and the usb debugger on it, often this function is hidden and each manufacturer has its own activation method, but by default this procedure looks like this. Going into the settings, we find the item "about phone" or "about software", and several times quickly click on the item "Build number". Then the "Developer" item will appear, where you need to enable the "USB debugger".
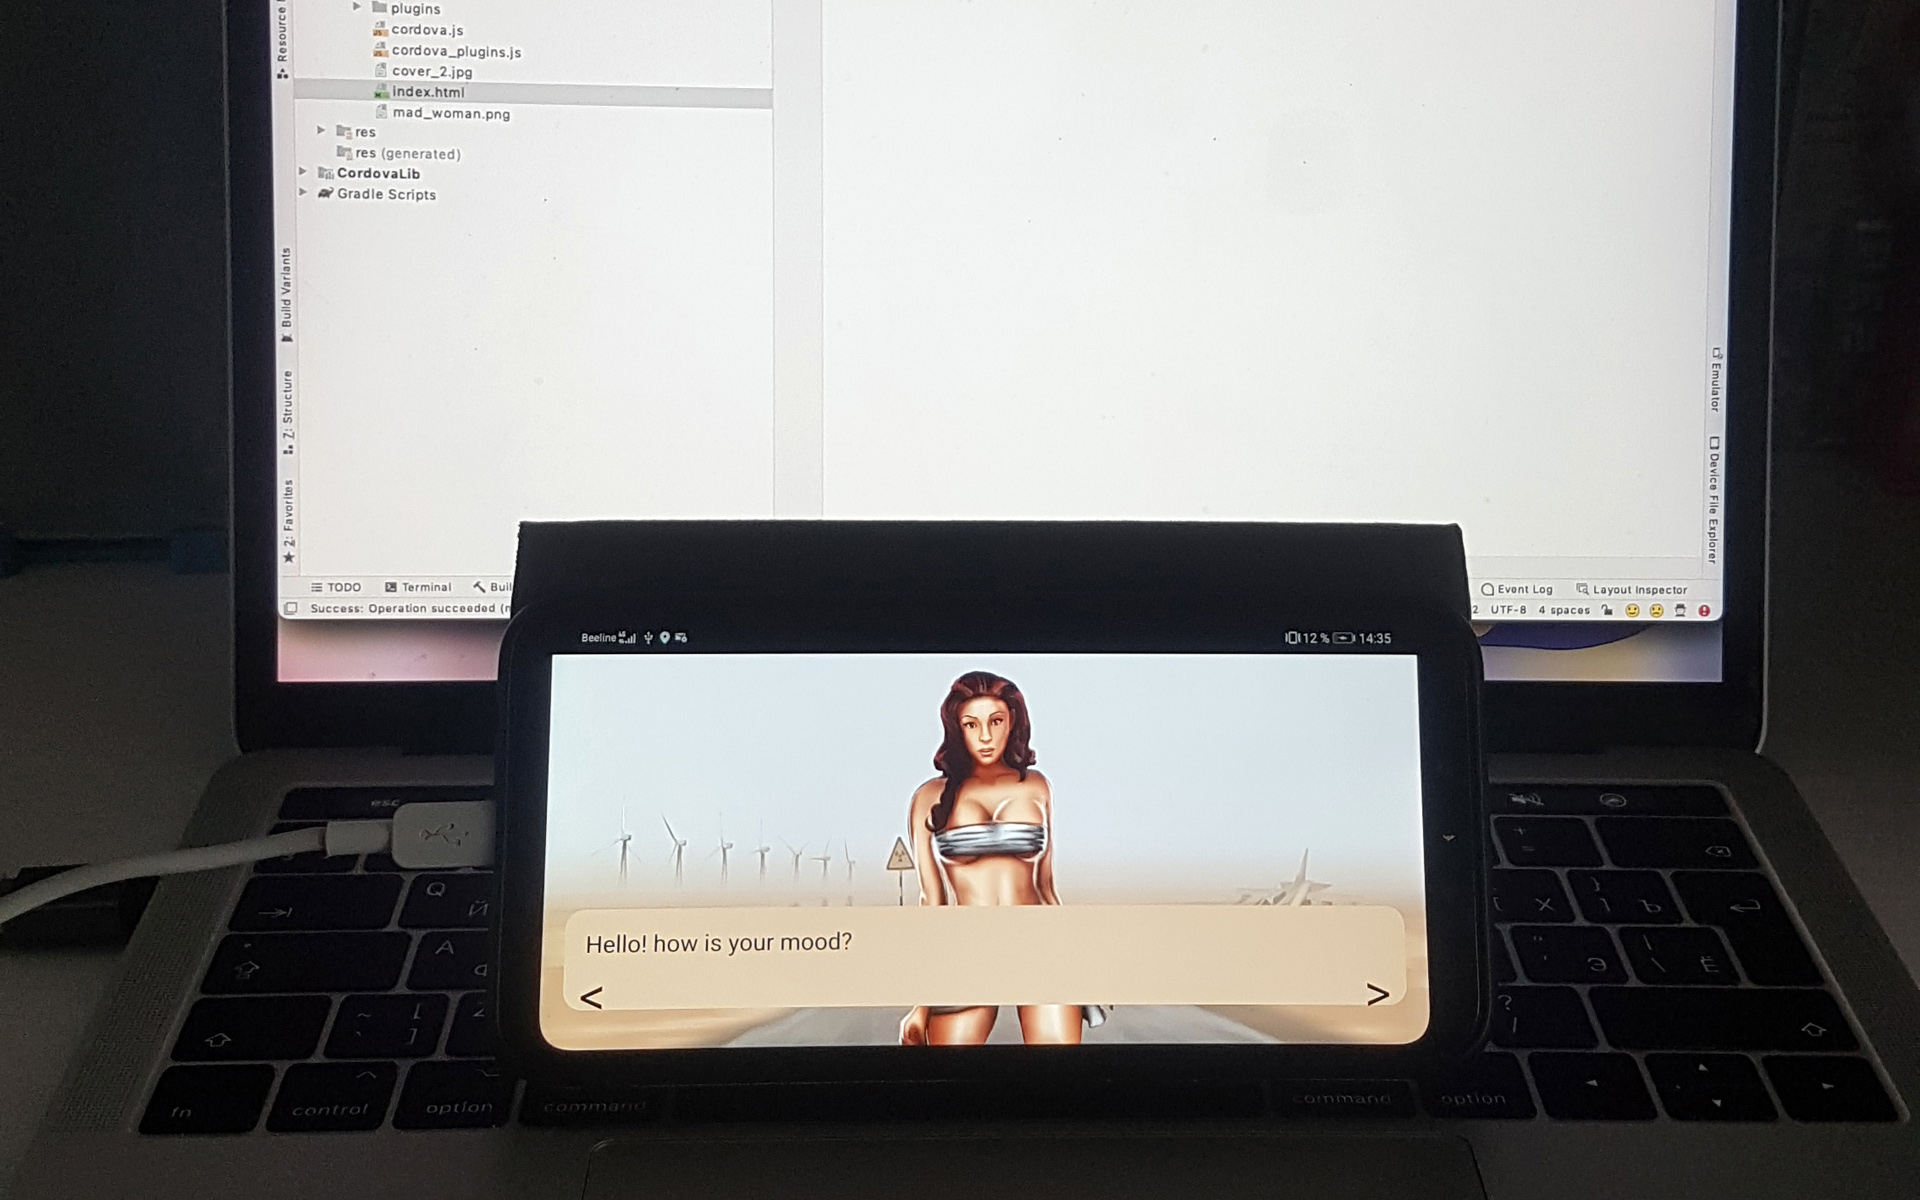
Step 8 If you succeed then you can run the project on the android device.
Step 9 We go into the folder with html data. It is located in app / assets / www . Right-click any file in that folder and choose "Reveal Finder".
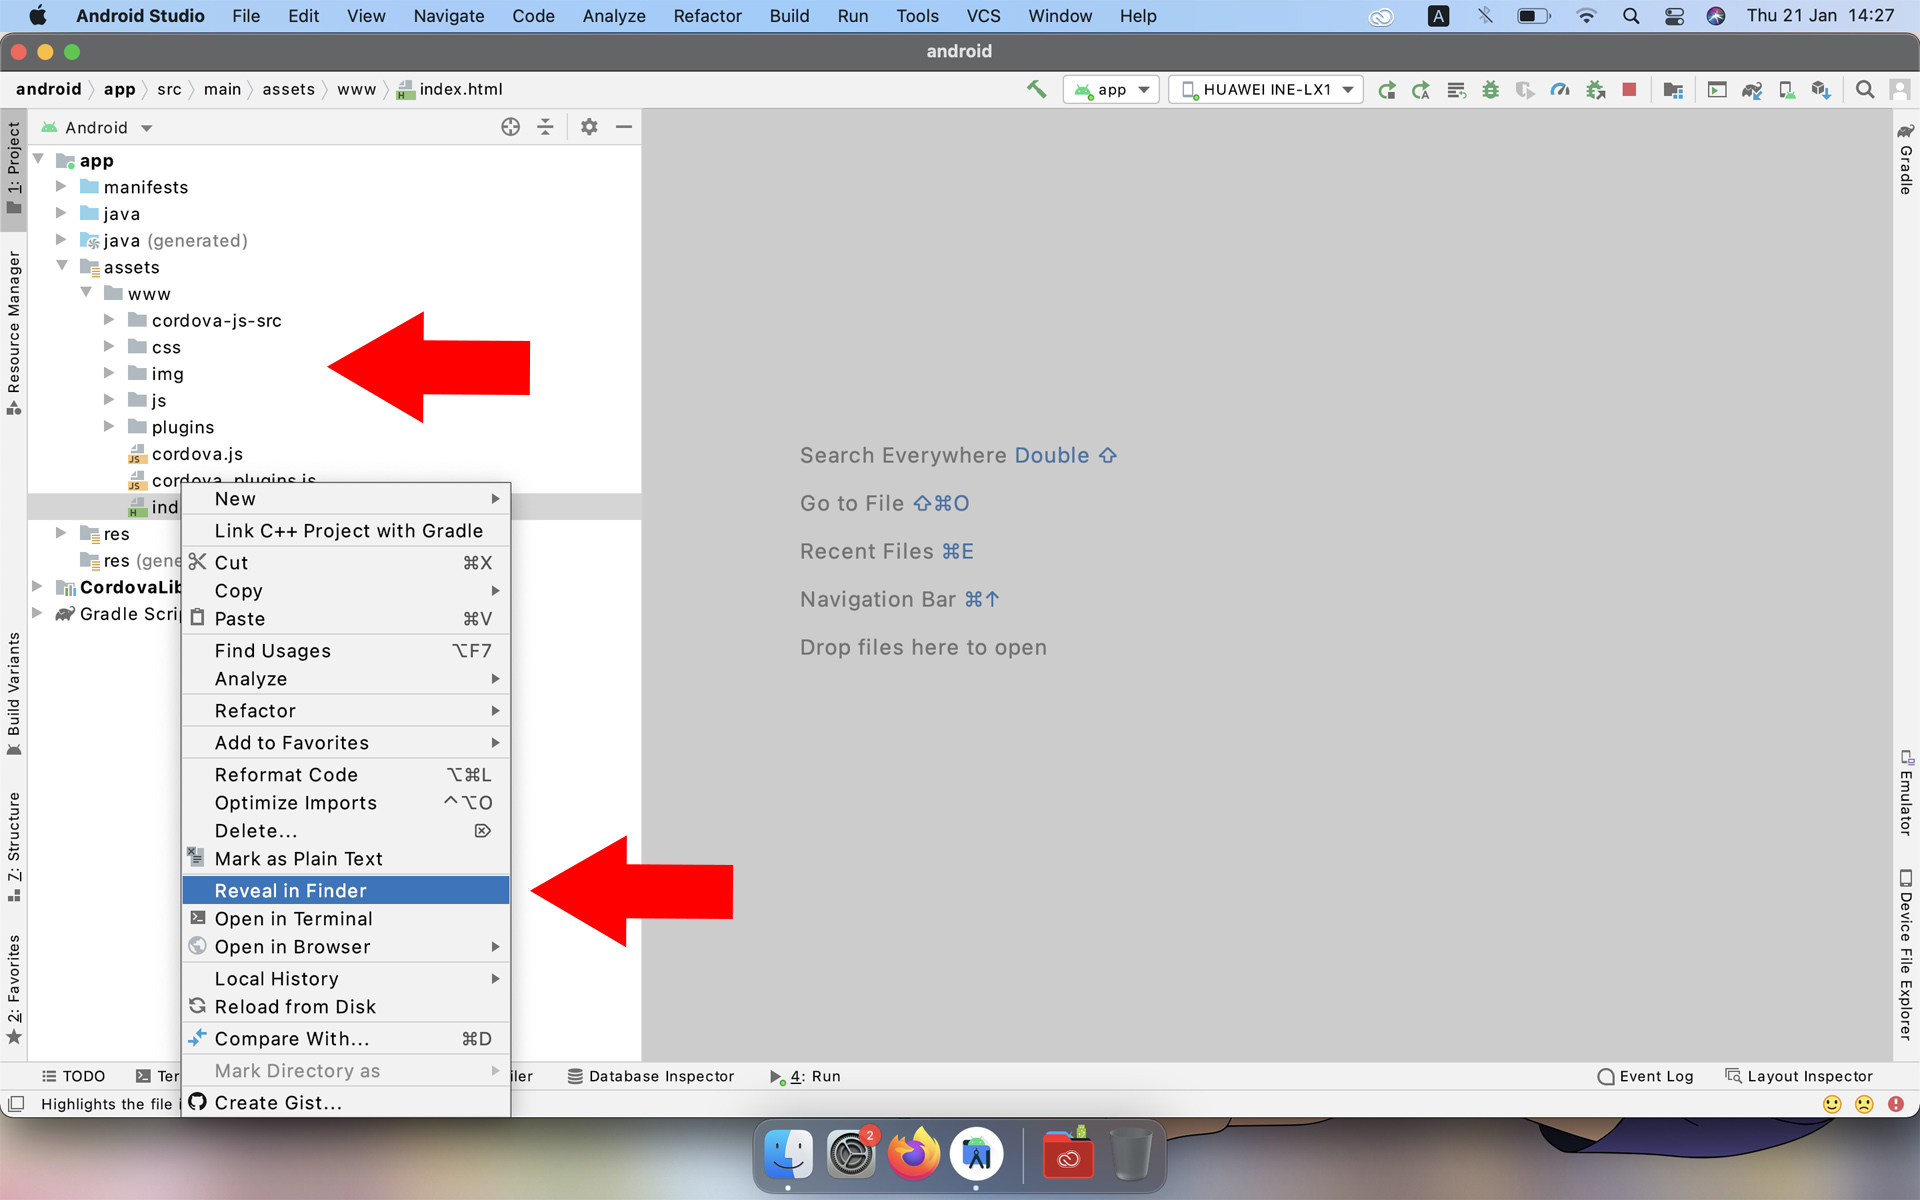
In the folder that appears, delete everything except the "plugins" folder of the "cordova.js" and "cordova_plugins.js" files.

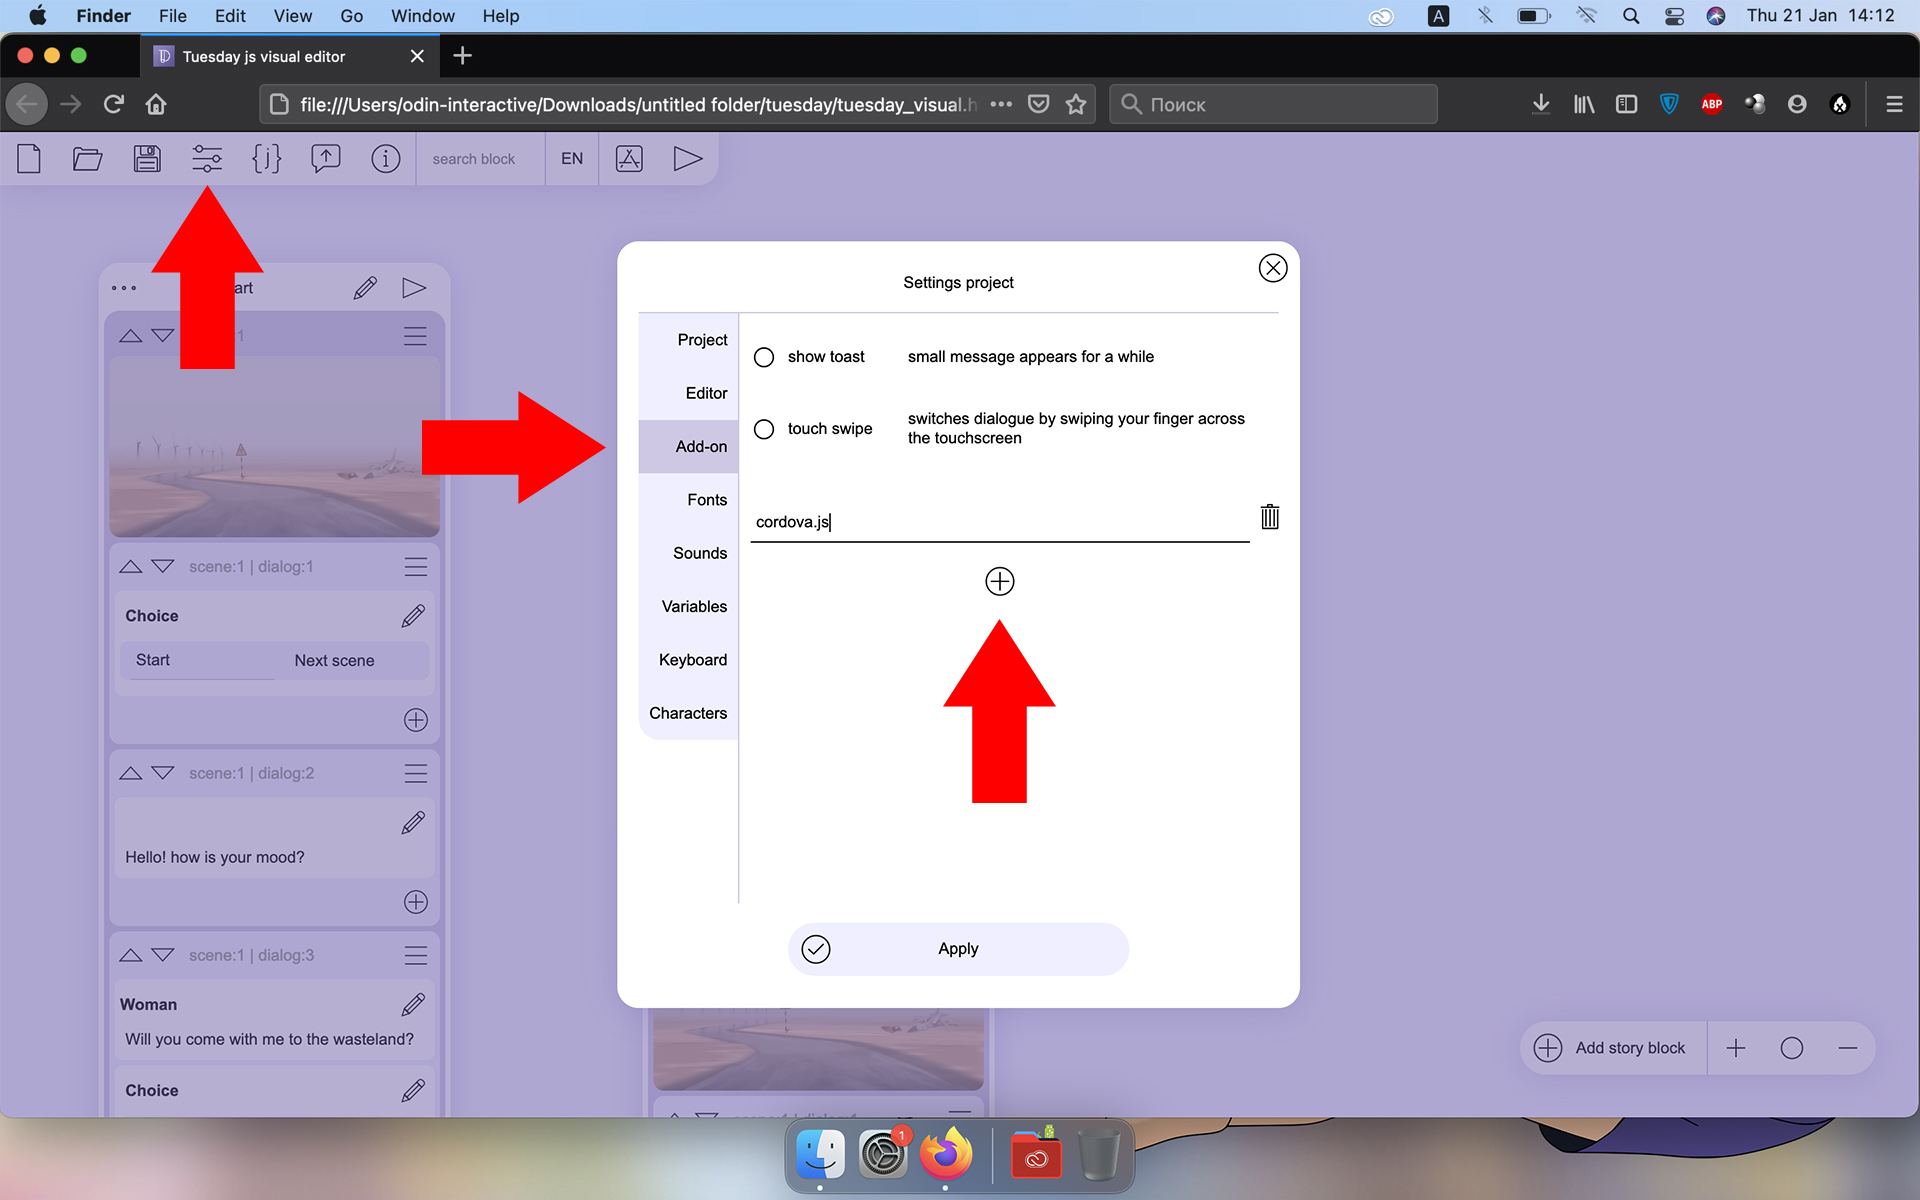
Step 10 In the "settings", open the "Add-on" section and add the "cordova.js" file to it so that your project can use the Cordova features.
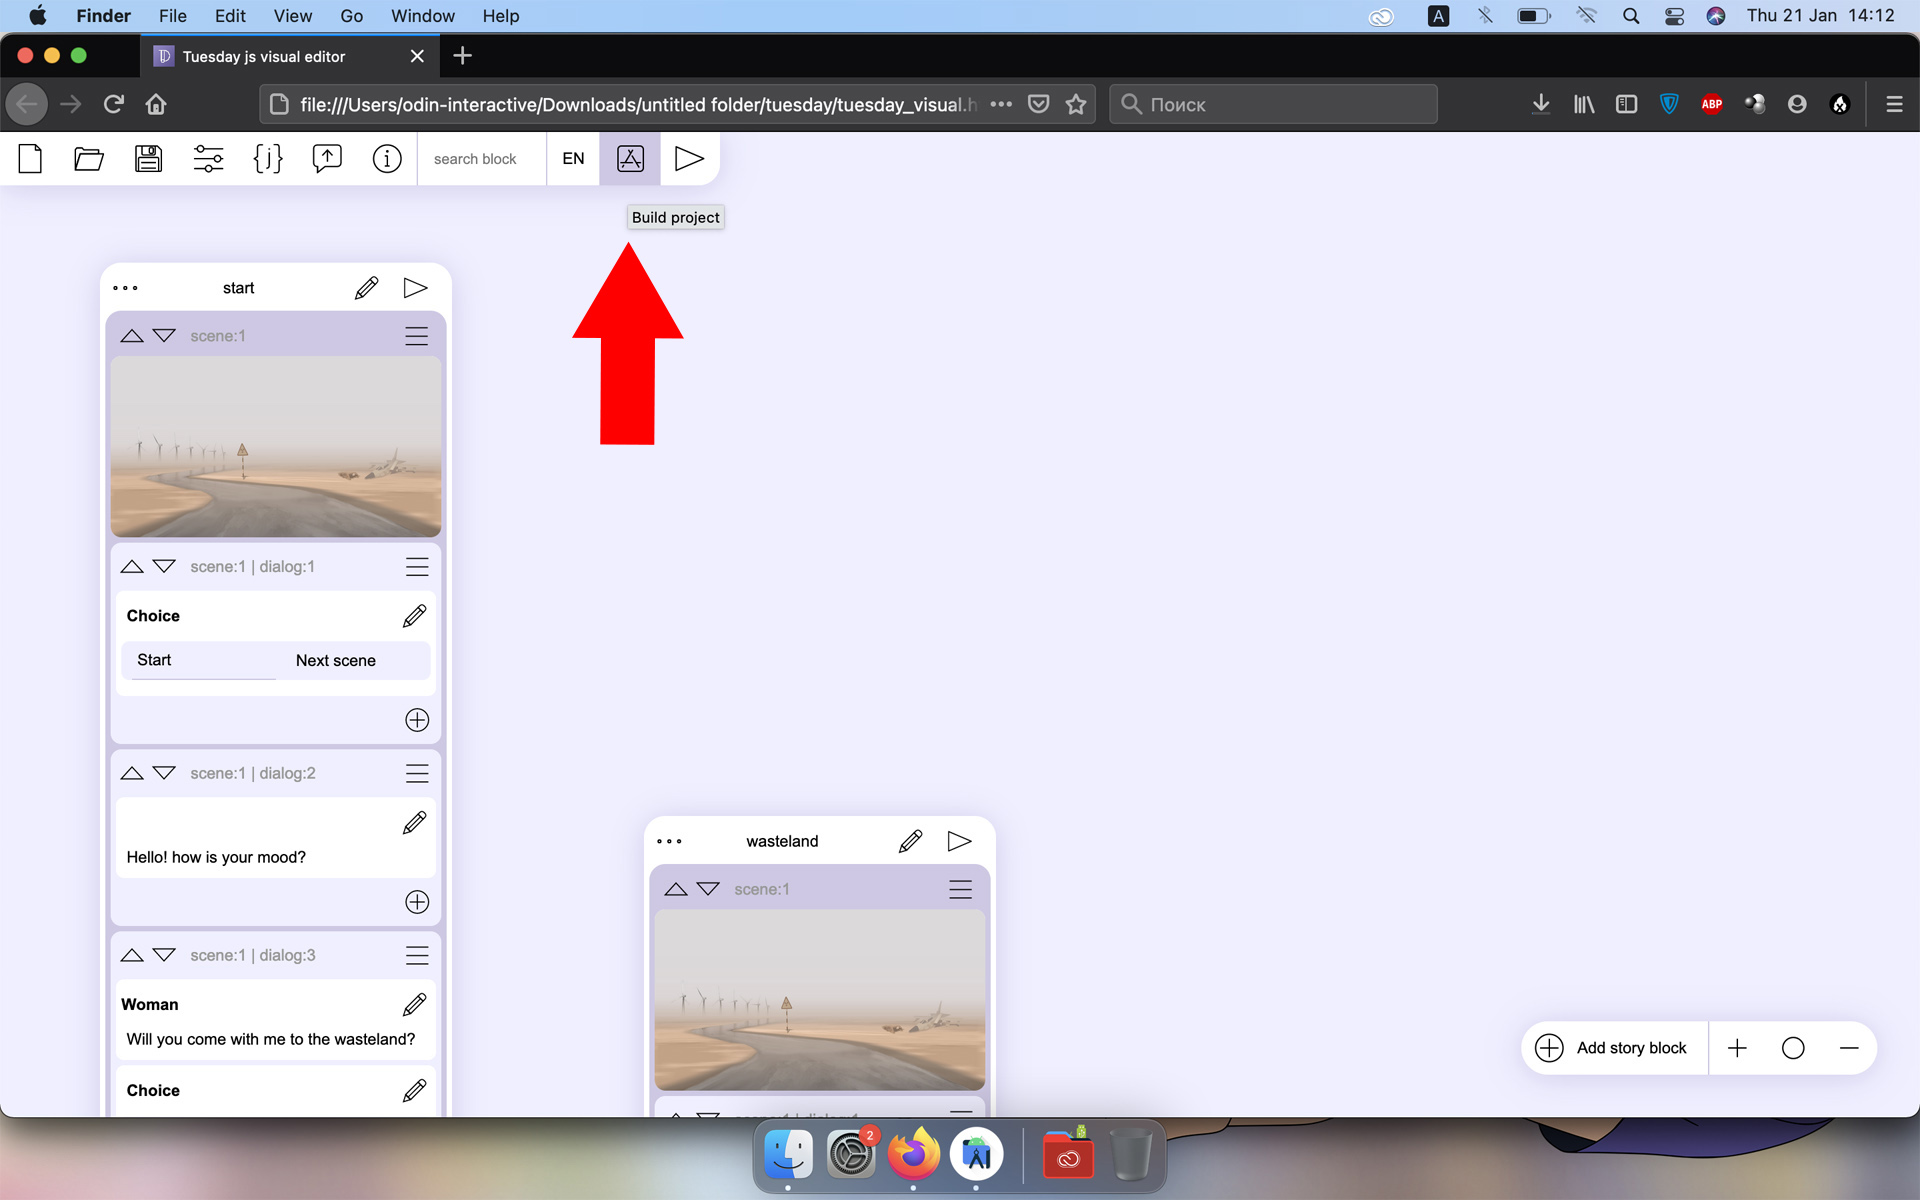
Build the project
Step 11 copy the files from the project working folder and upload them to the "www" folder of the Android project.

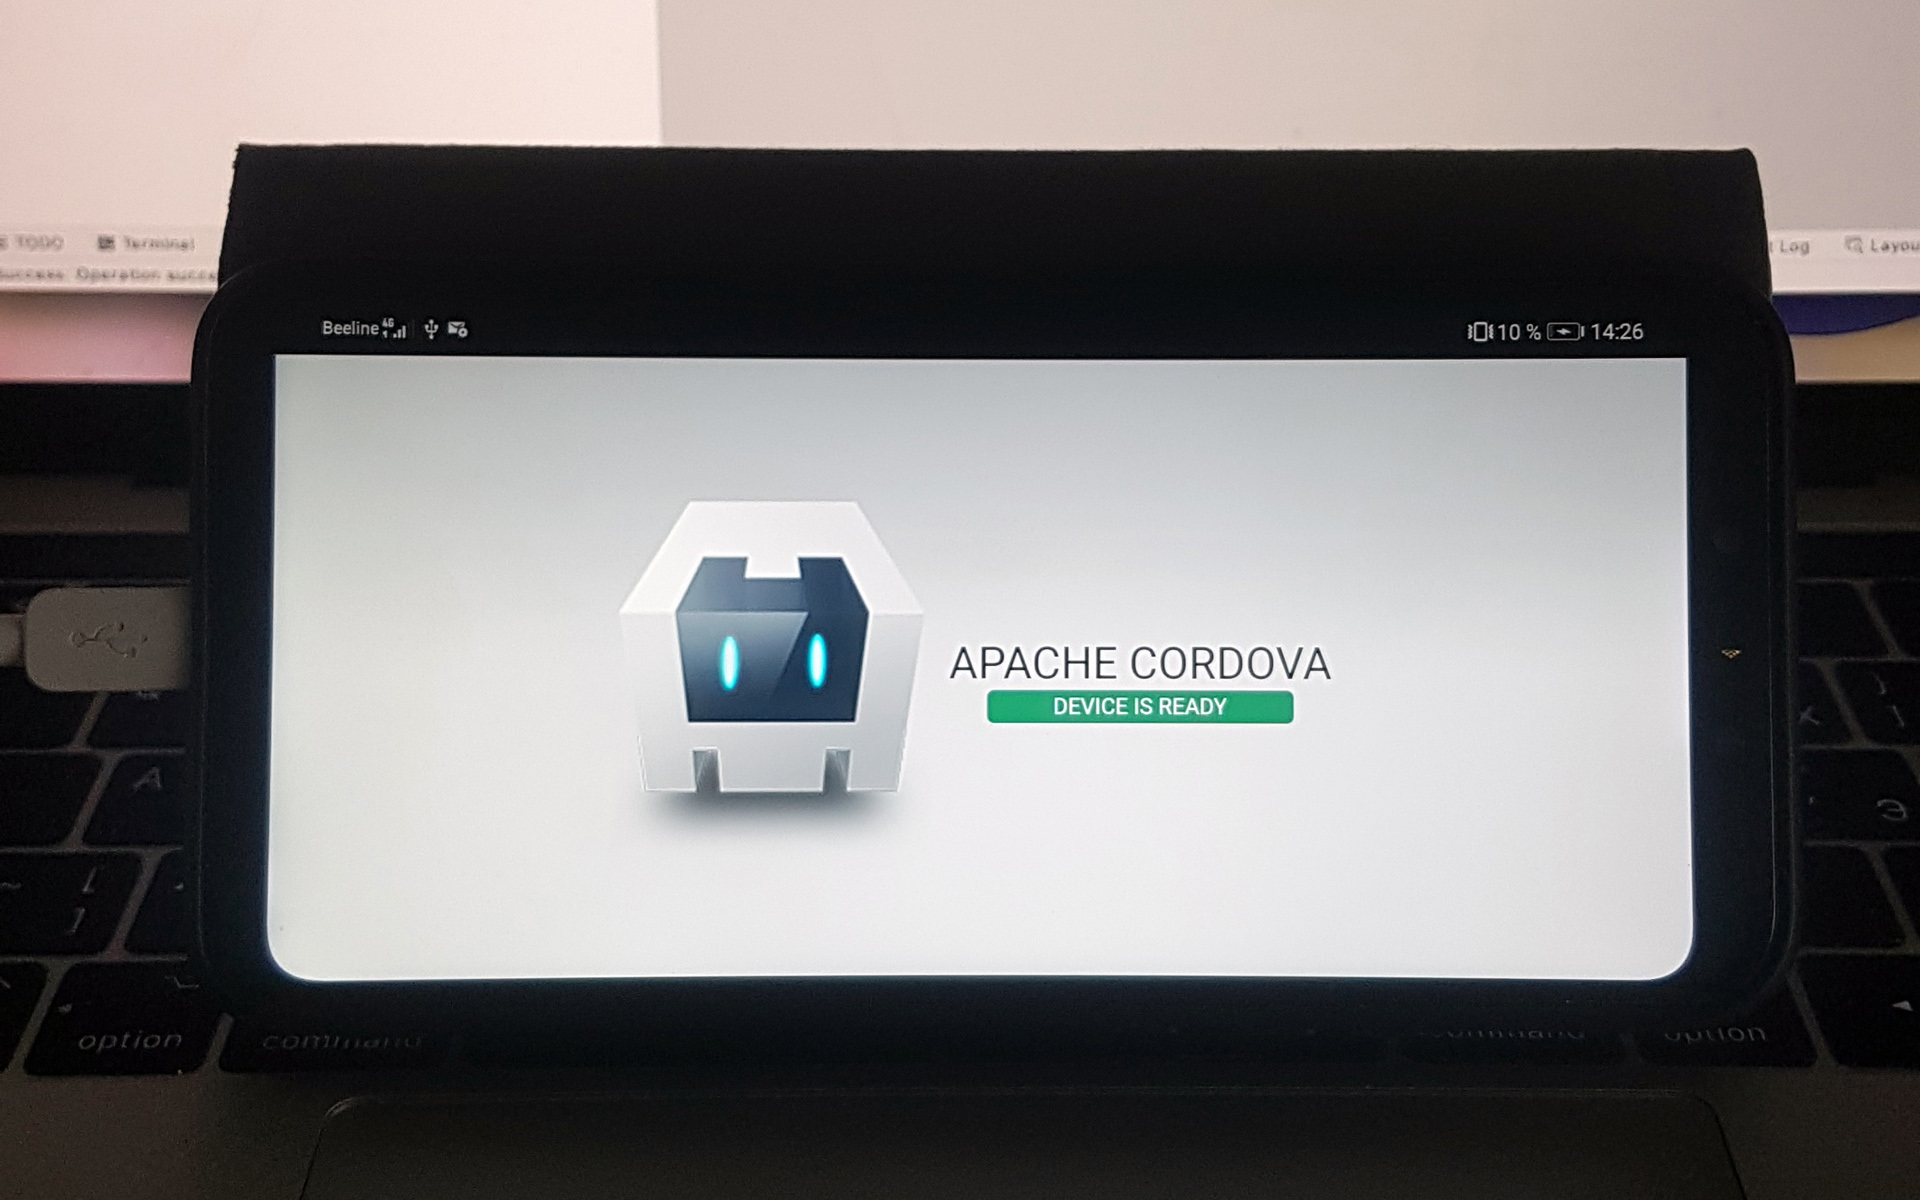
You can try running the project to make sure everything is working correctly.
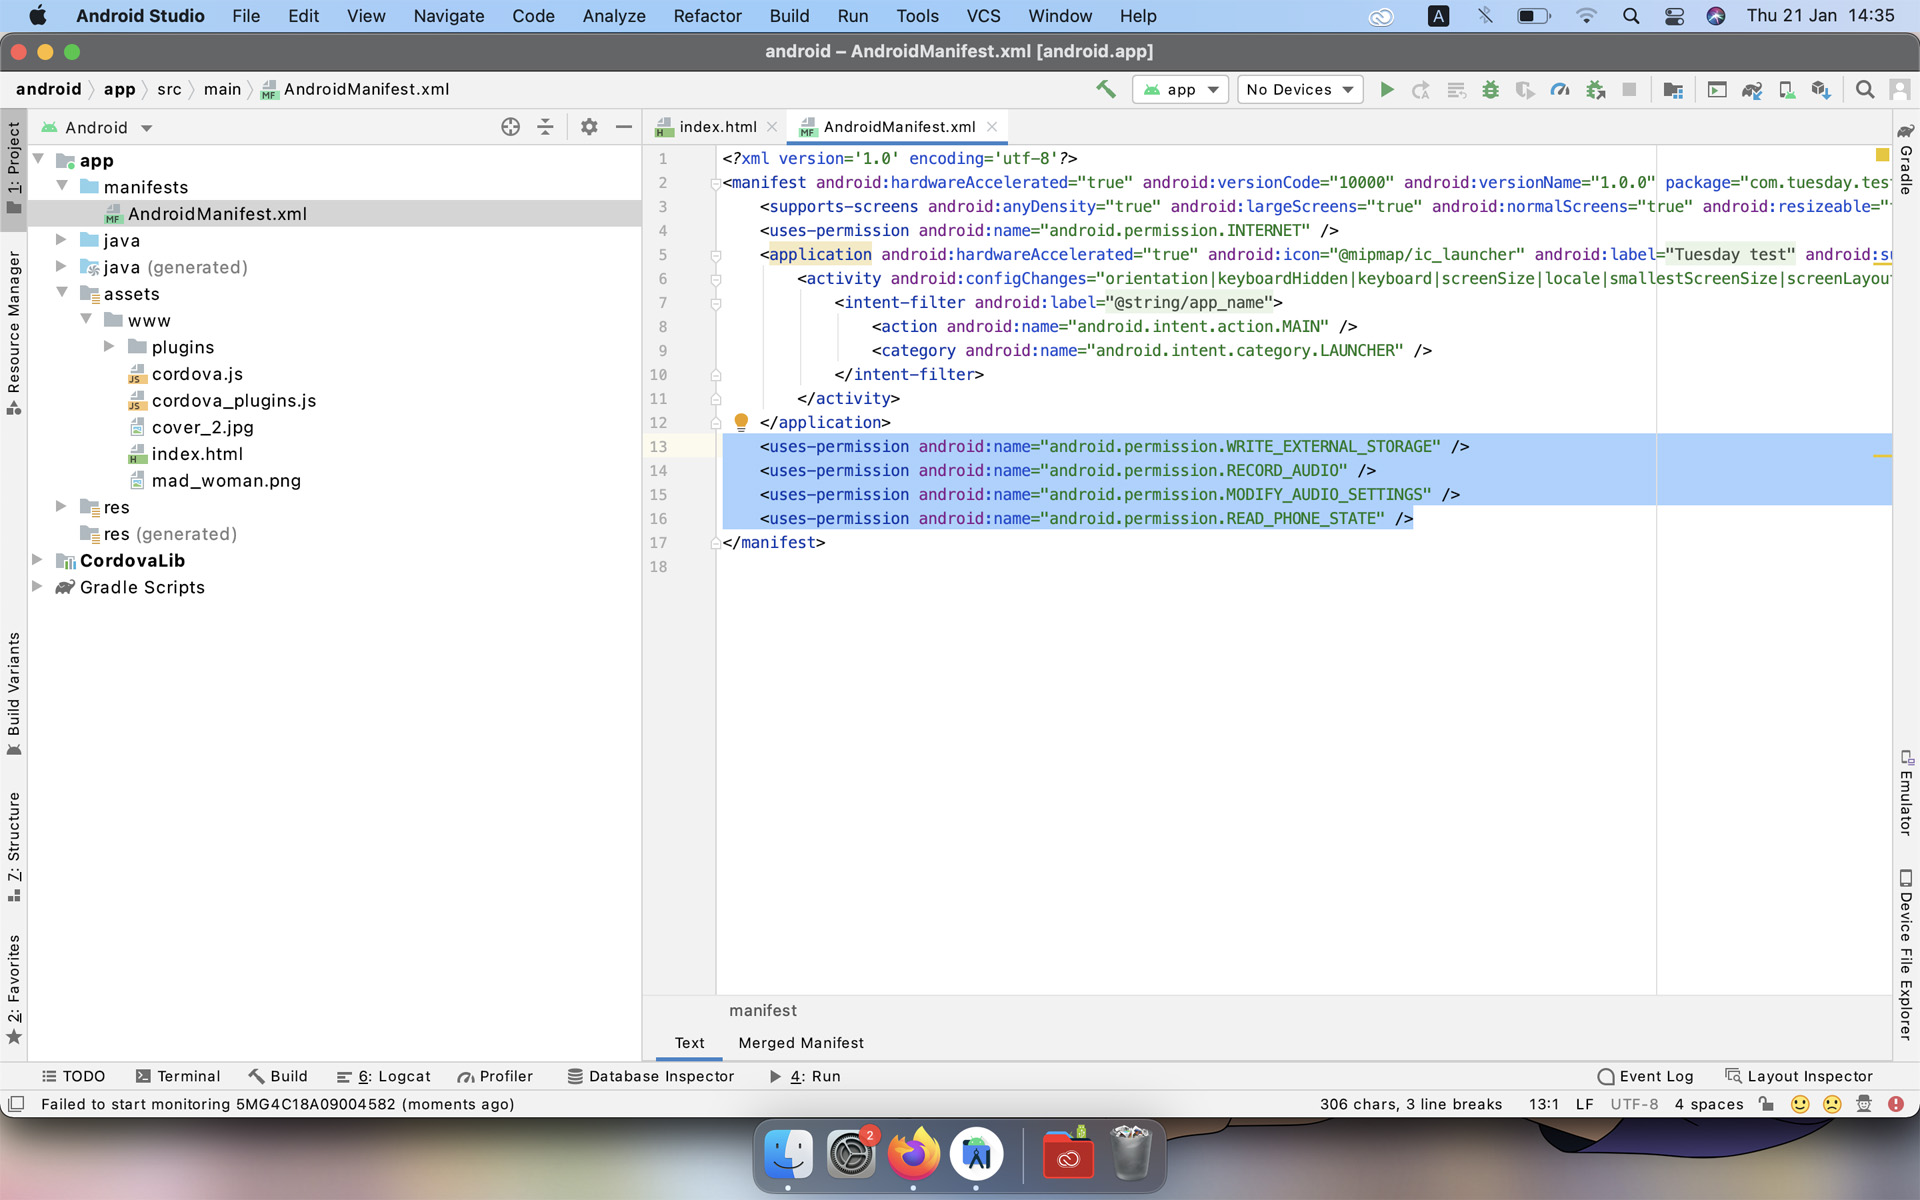
Step 12 Now let's start correct a project for Android. Most of the parameters are specified in AndroidManifest.xml.
It is advisable to get rid of unnecessary intentions in it, if you will not use them in the future.
It also lists code versions, assembly versions, icon set, title, screen orientation, and more. Remember to upgrade your build versions every time you update apk.
Step 13 To create your own icon set, Android studio has a very handy tool. Right-clicking on the ‘drawabel’ folder and selecting ‘Image Asset’ will open the icon editor.
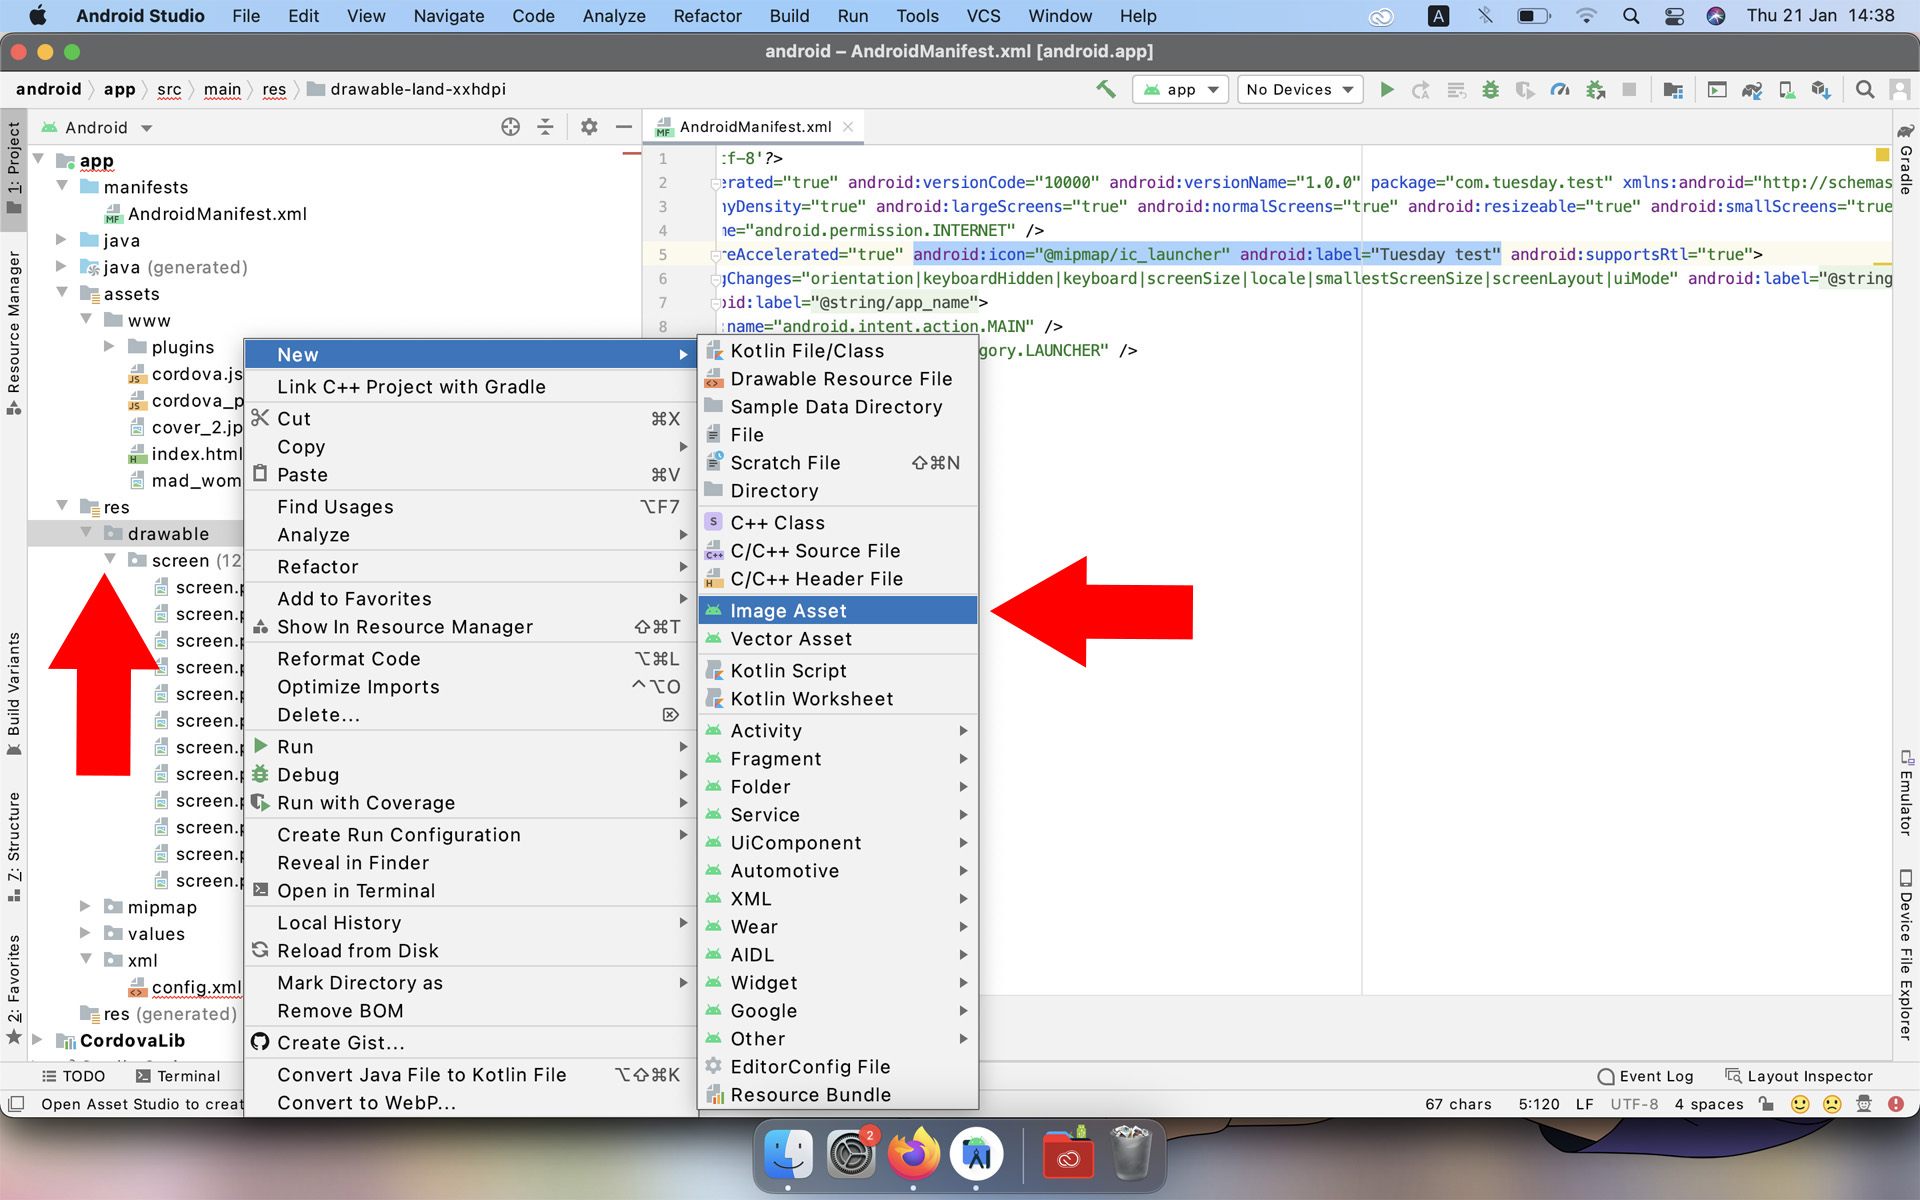
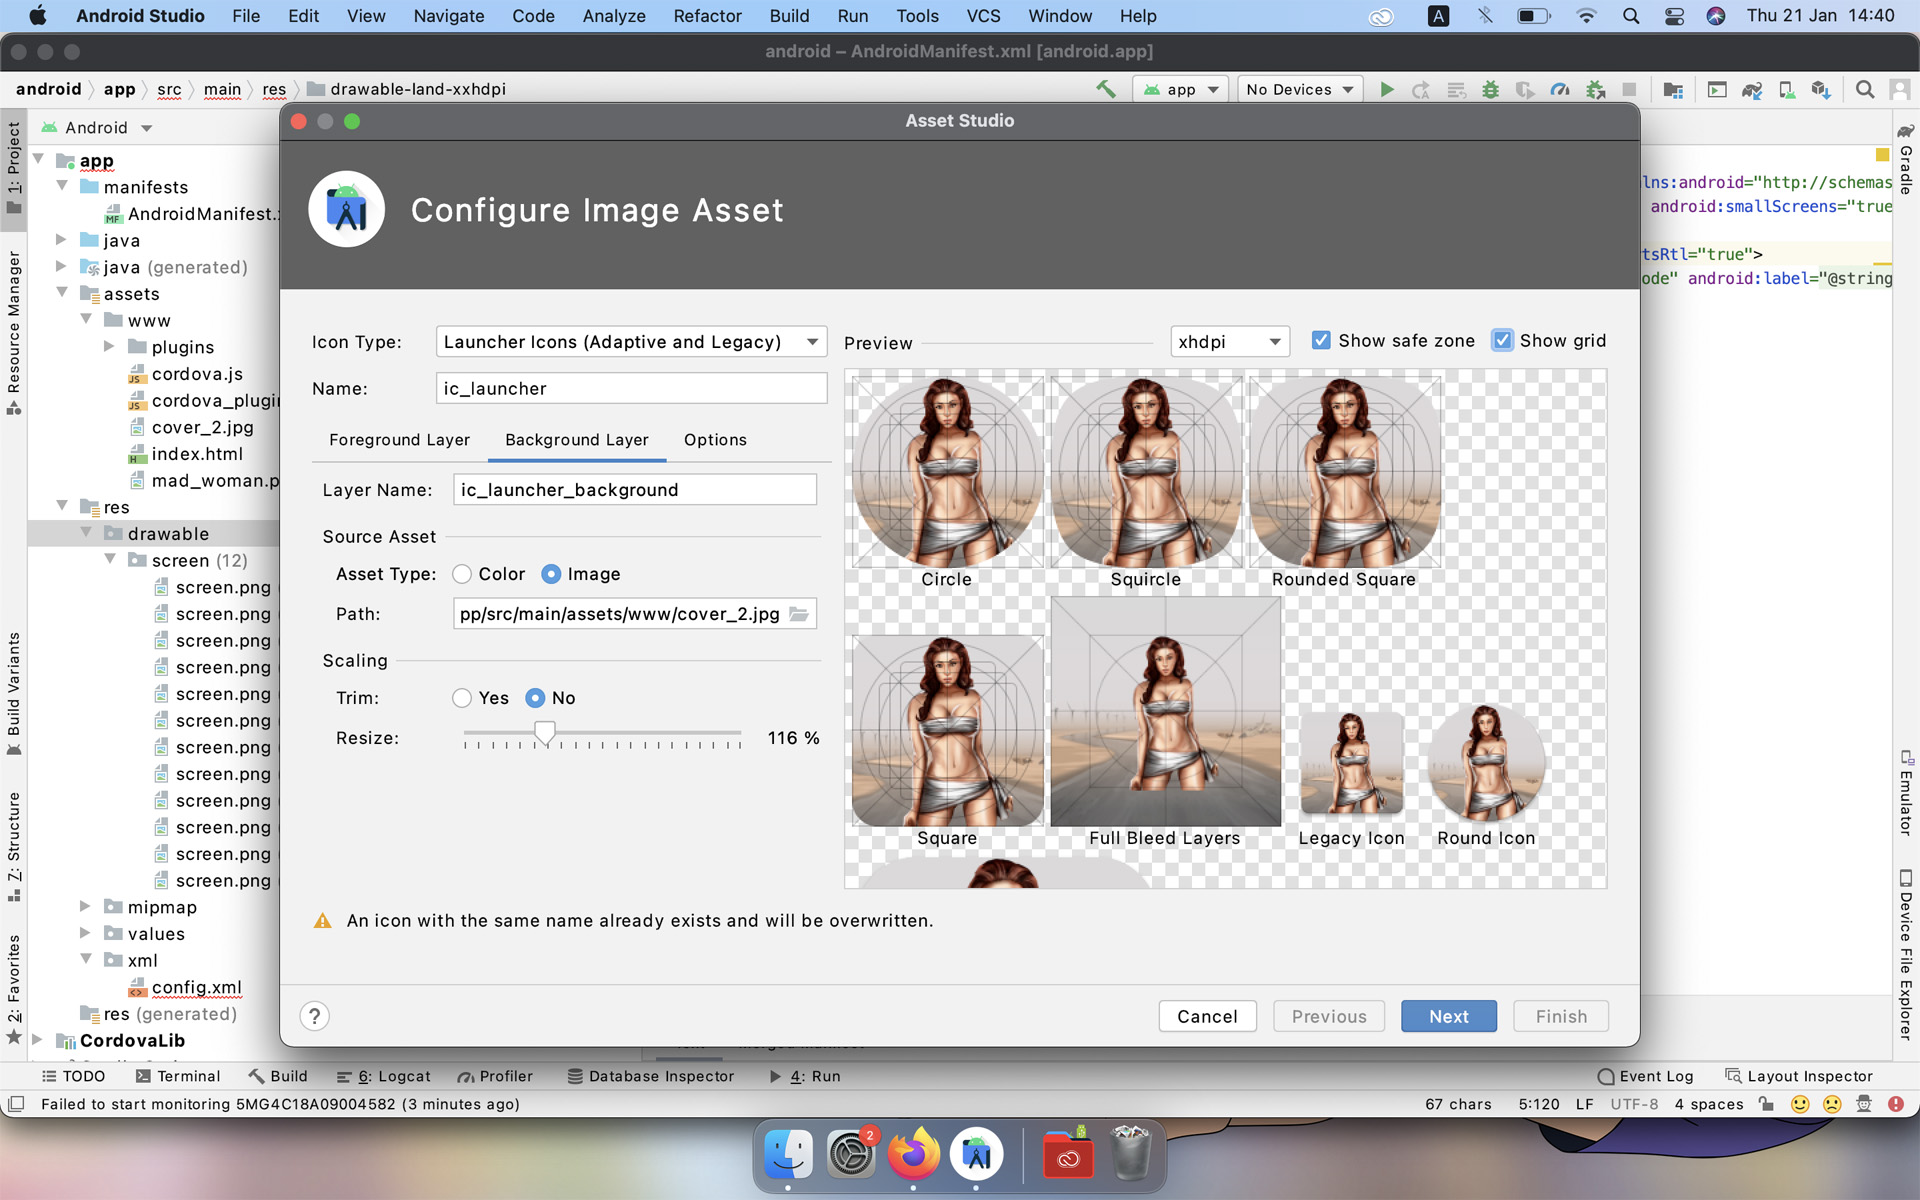
You can also use any other graphic editor to create a set of icons.
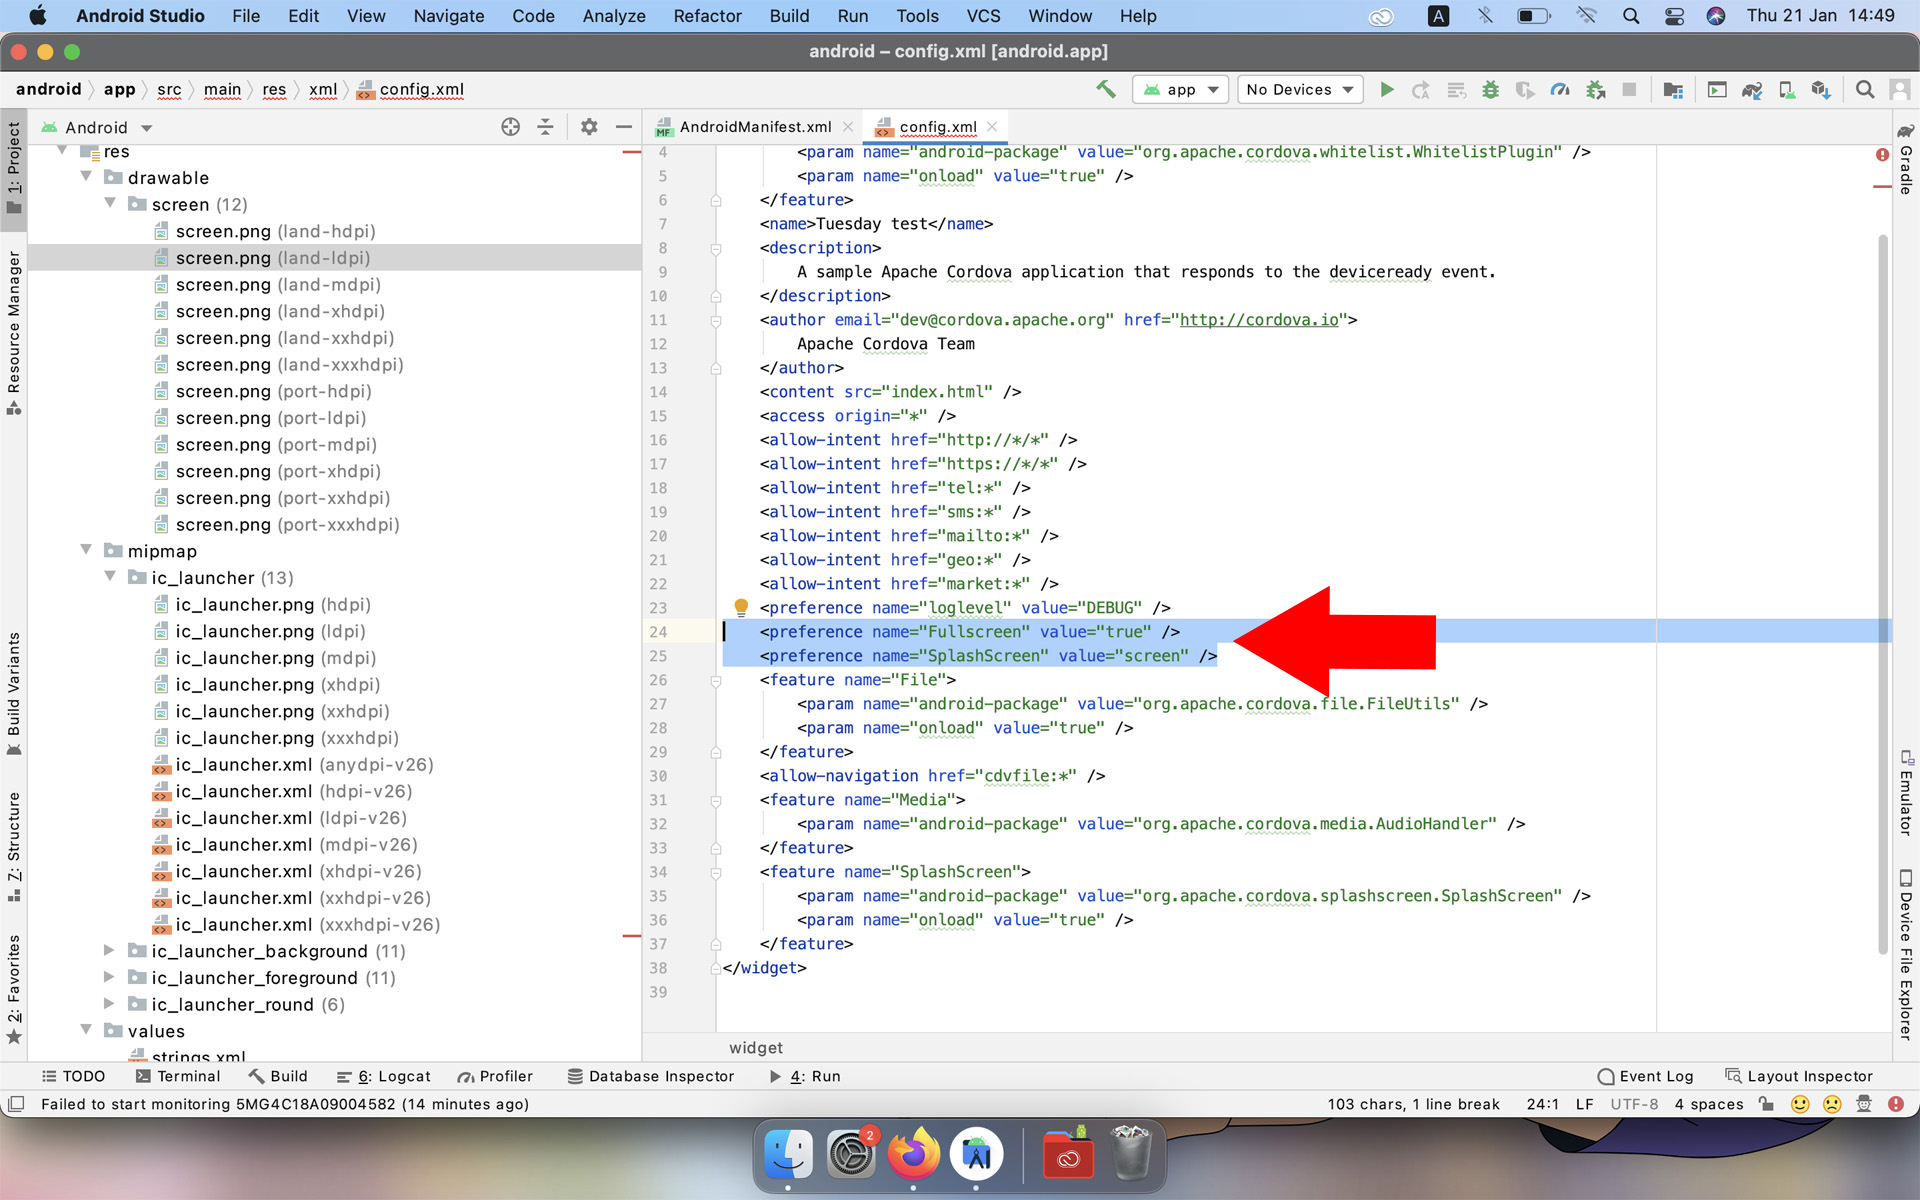
Step 14 The xml folder contains a confix.xml file with additional settings for the cordova project. In this case, I add parameters for the full screen and data for the splash screen.
<preference name = "Fullscreen" value = "true" />
<preference name = "SplashScreen" value = "screen" />
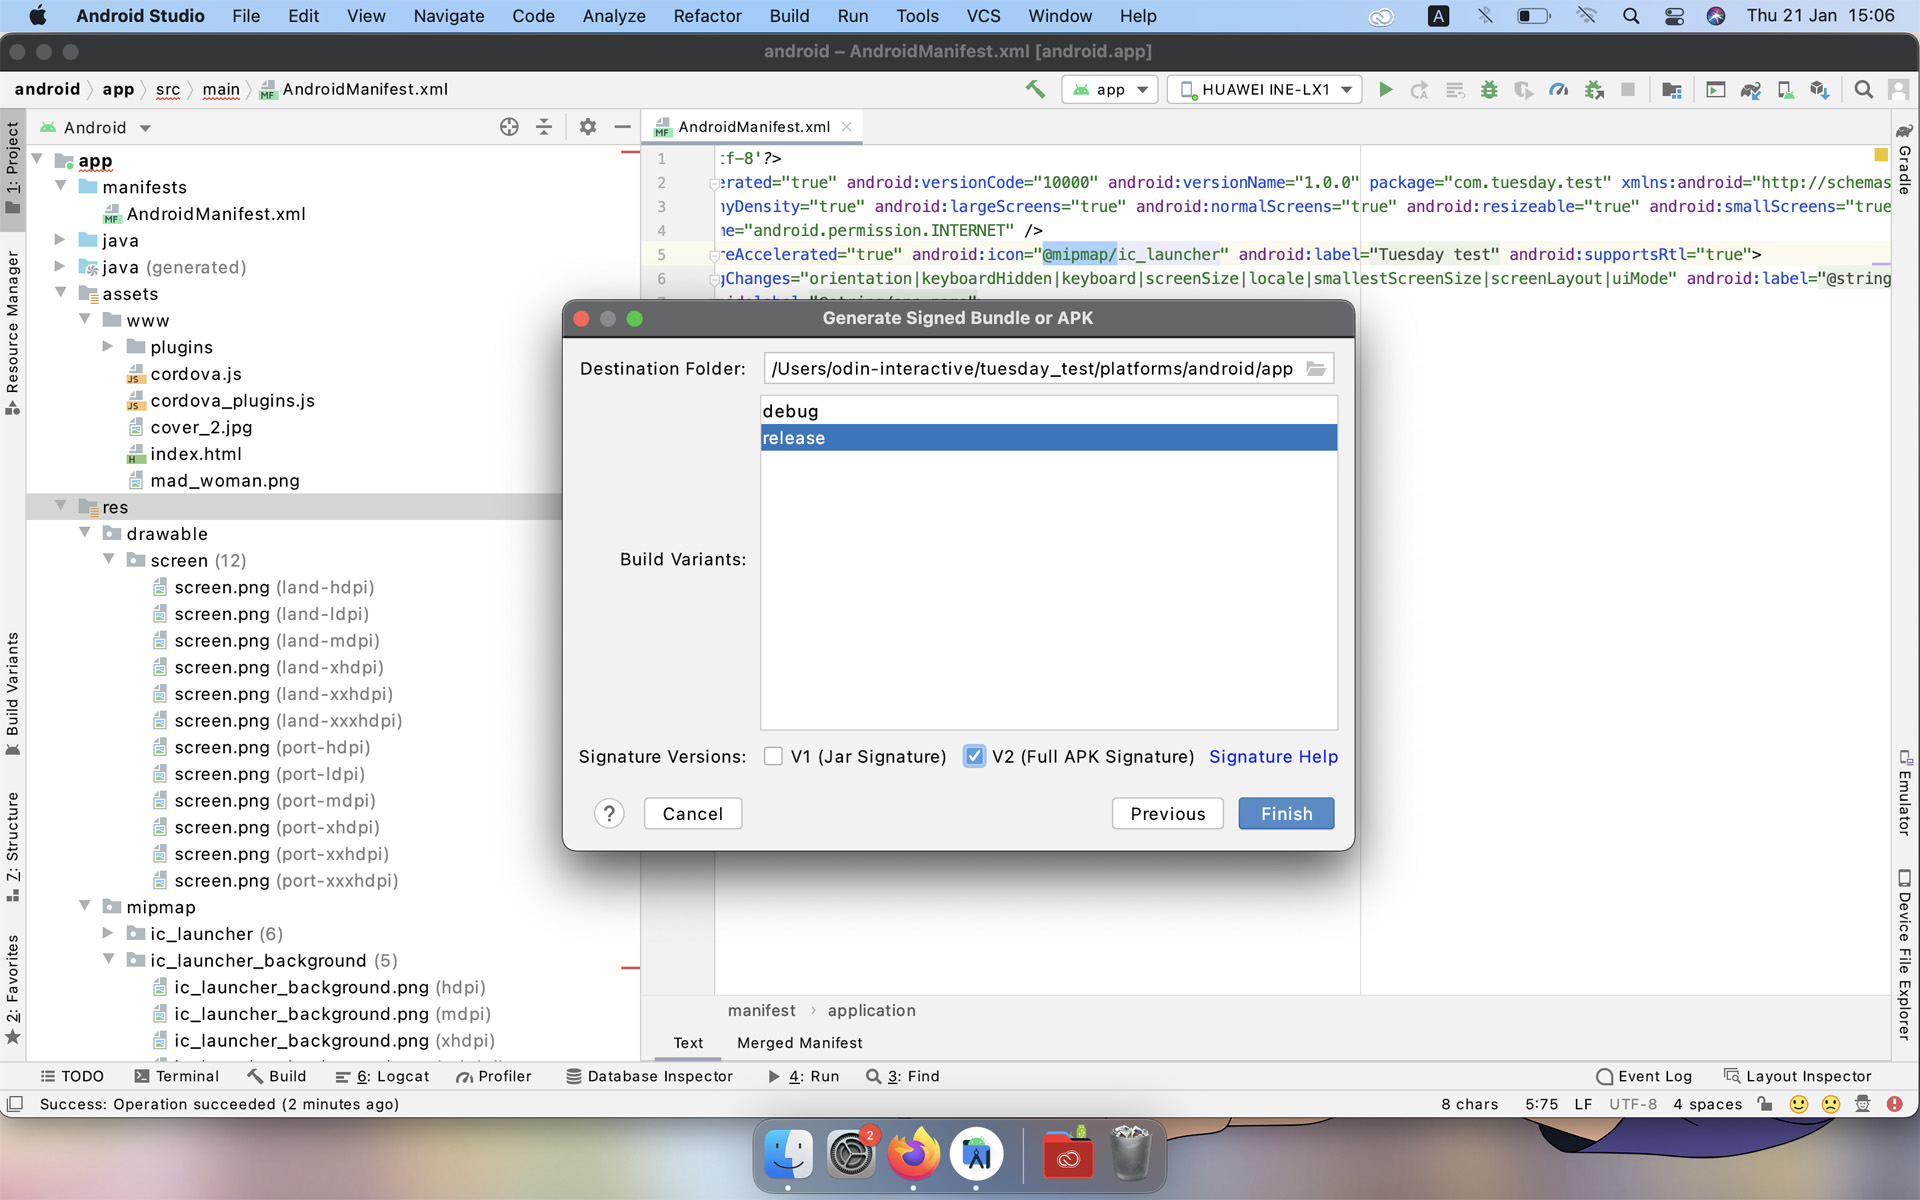
Step 15 now everything is ready to create apk, click build / created Signed Bundle / APK ...
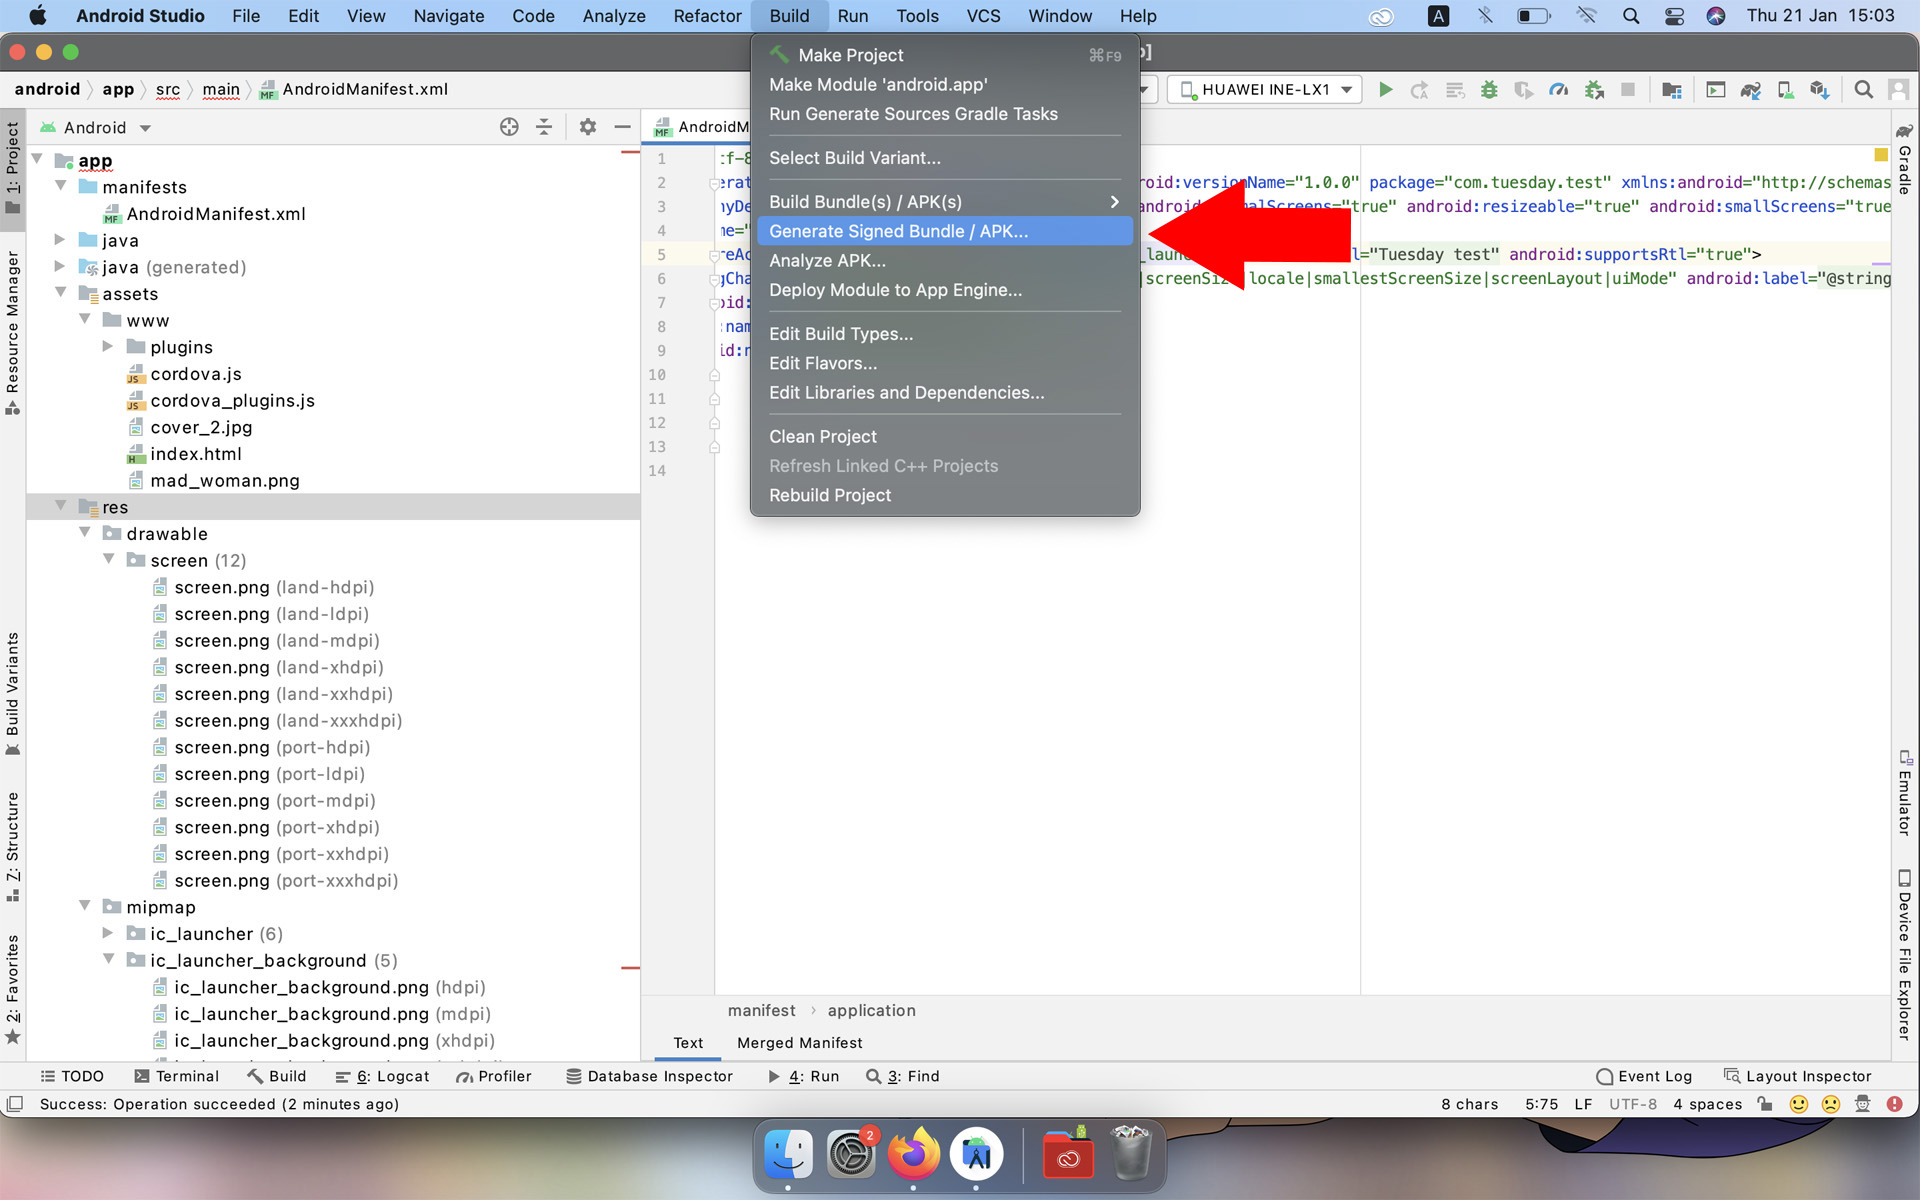
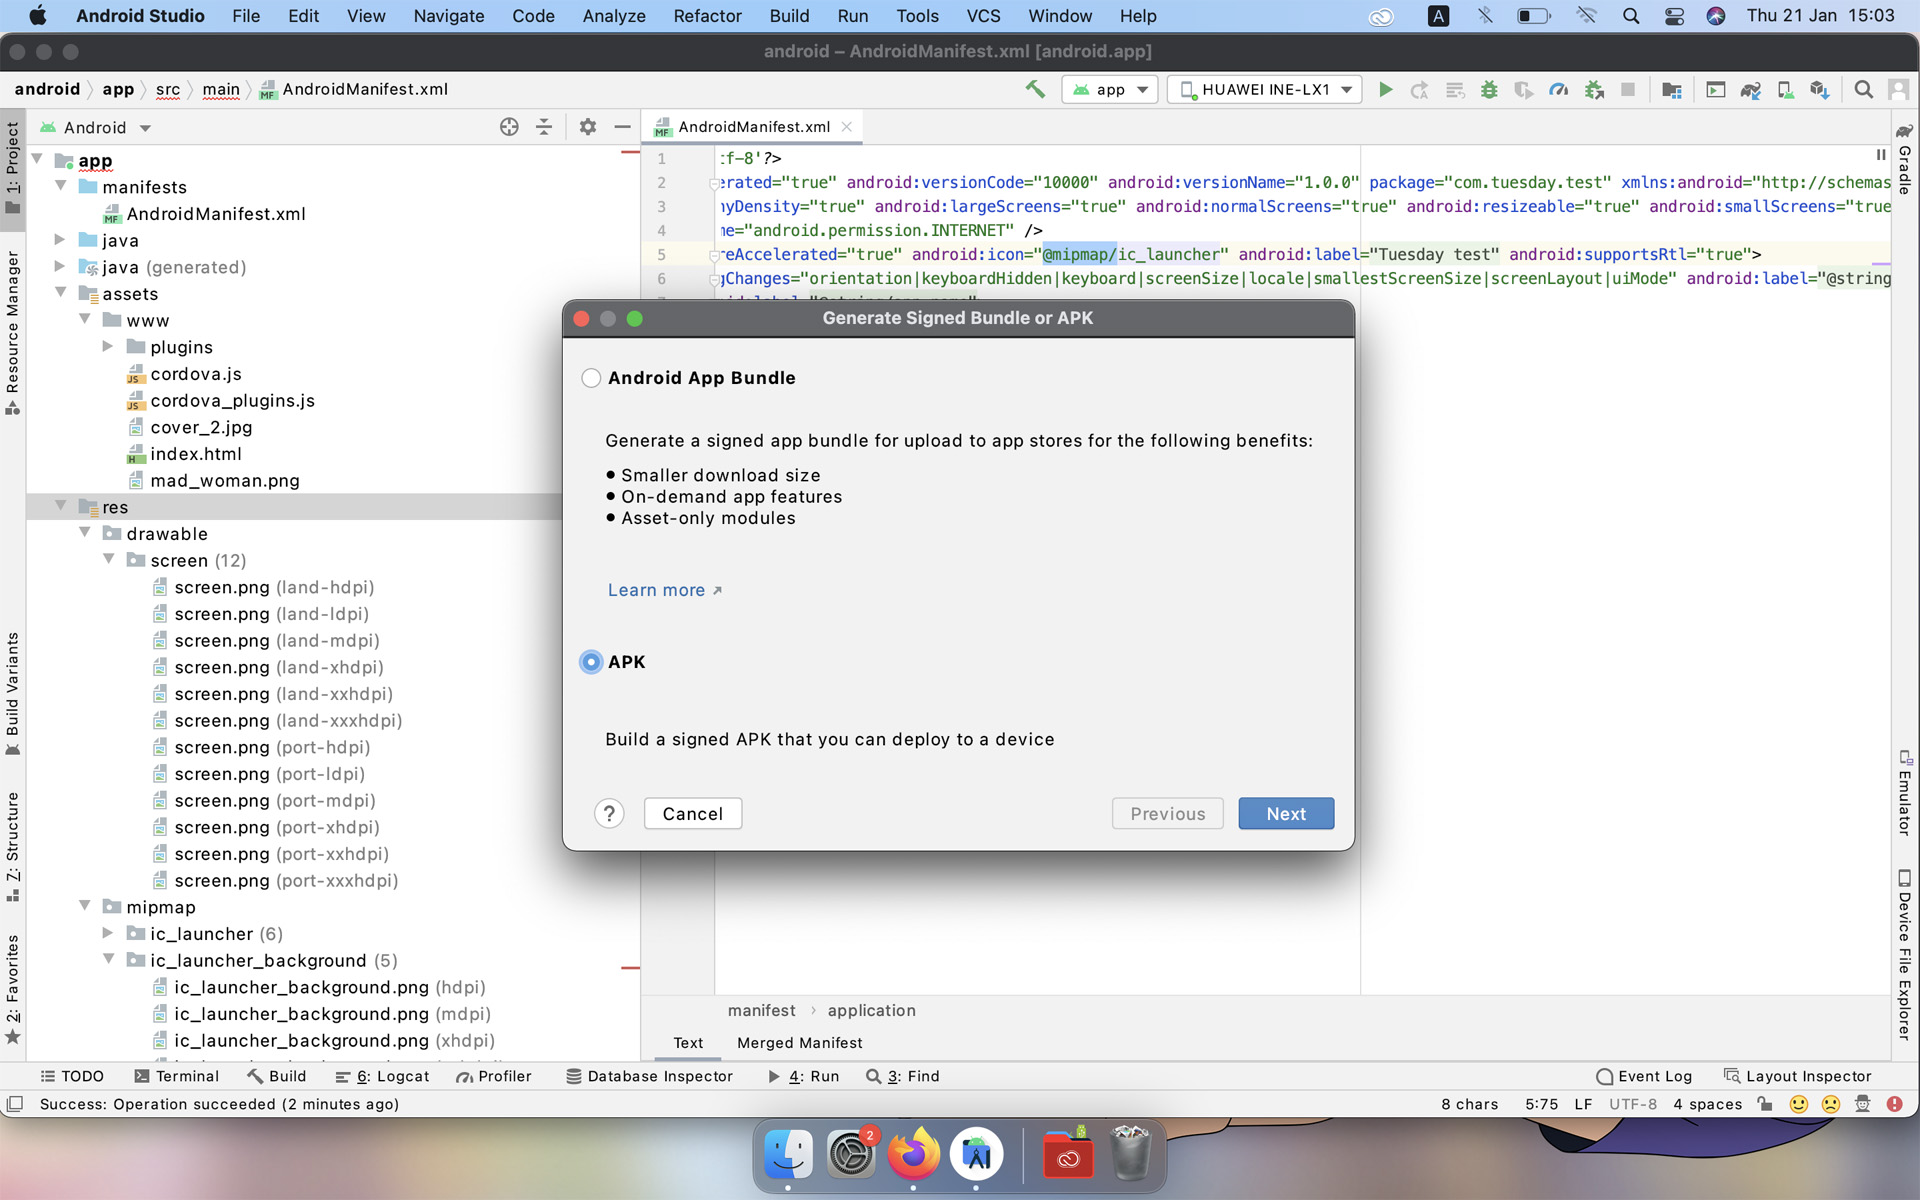
in the window that appears, select apk
Create a new Key Store if you don't already have one. This is a very important file that you sign your application with, if you lose it, you will not be able to upload new versions of apk to GooglePlay. One key store can contain several projects.
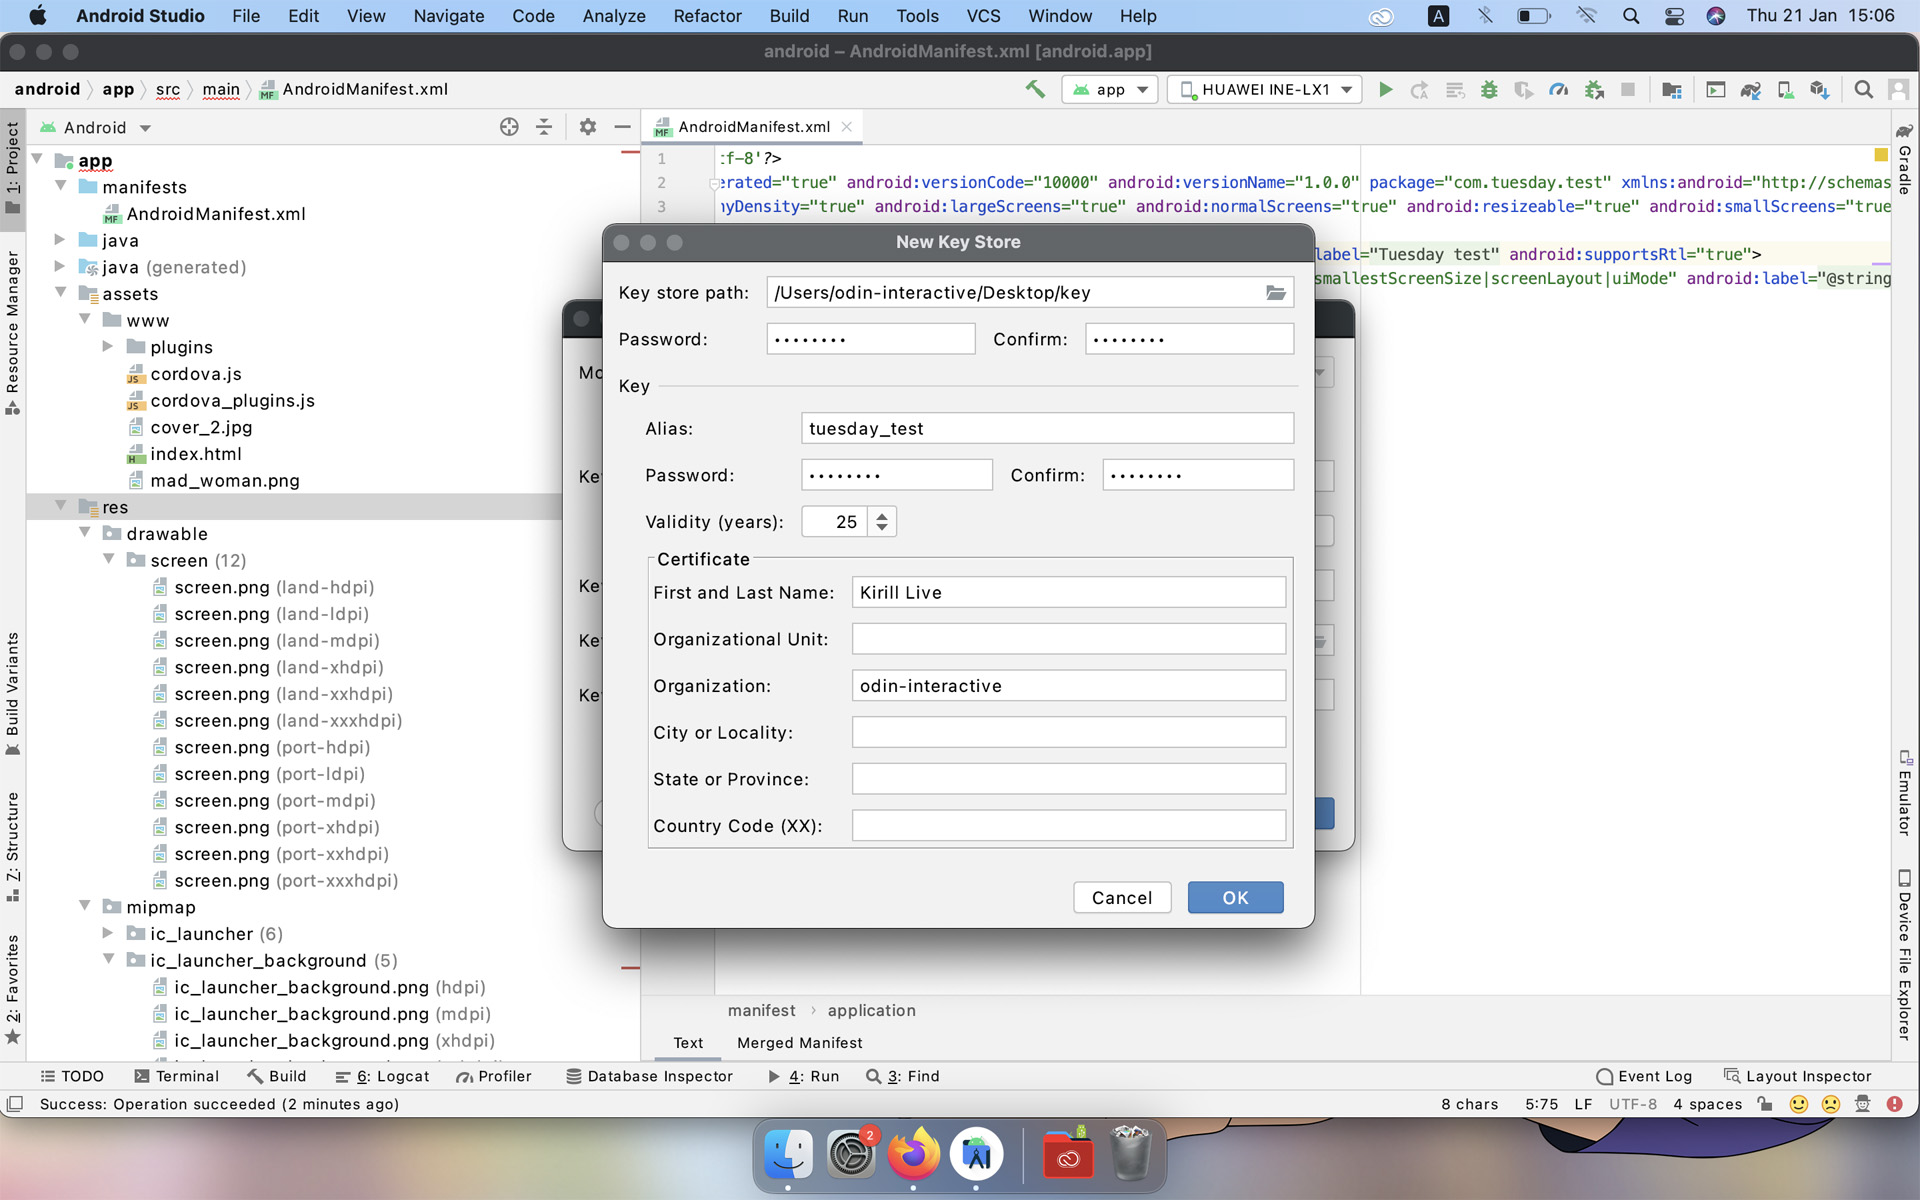
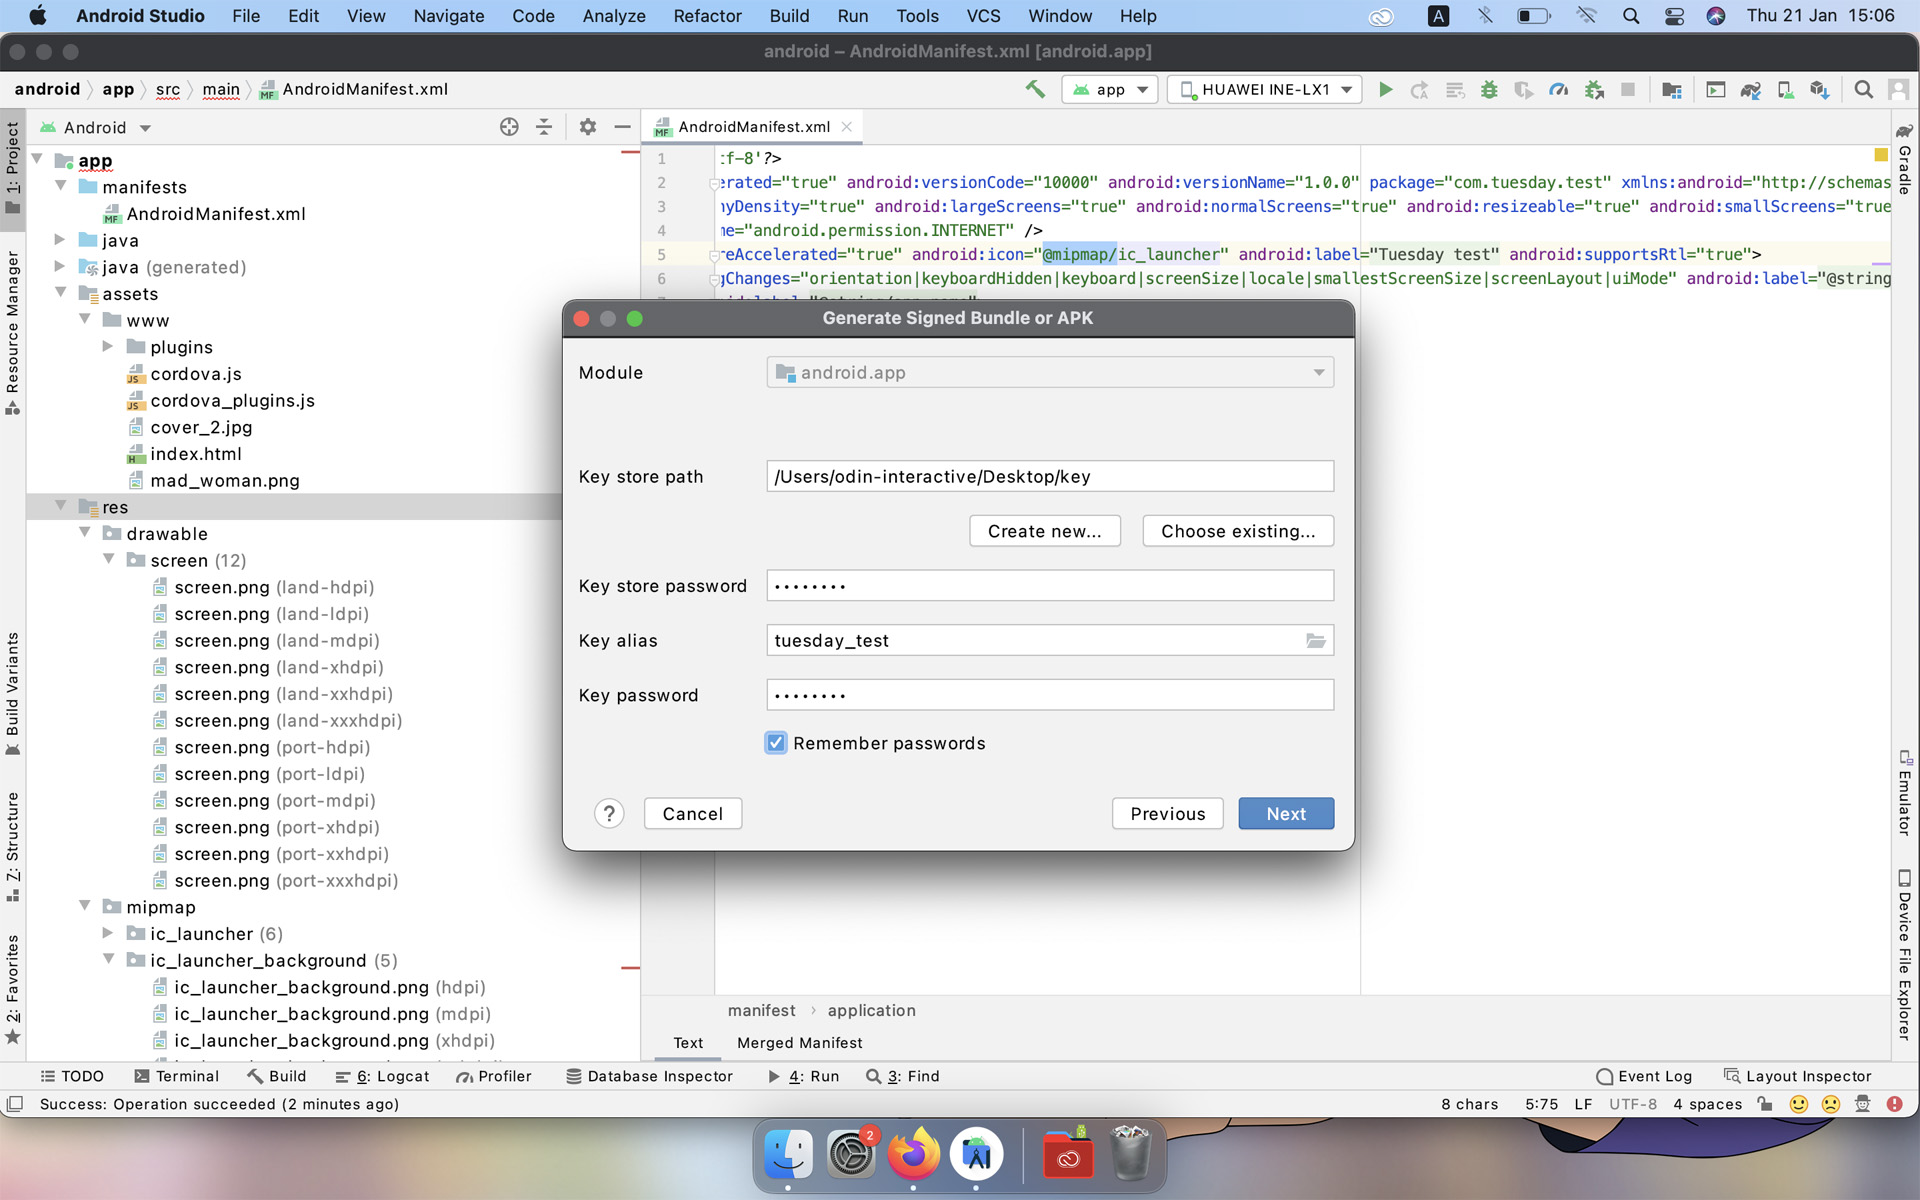
We indicate our Key Store and the password from it, select the project and also indicate the password, for the convenience of pressing we remember the password.
Select the build type "release" and the type of signature press "finish"
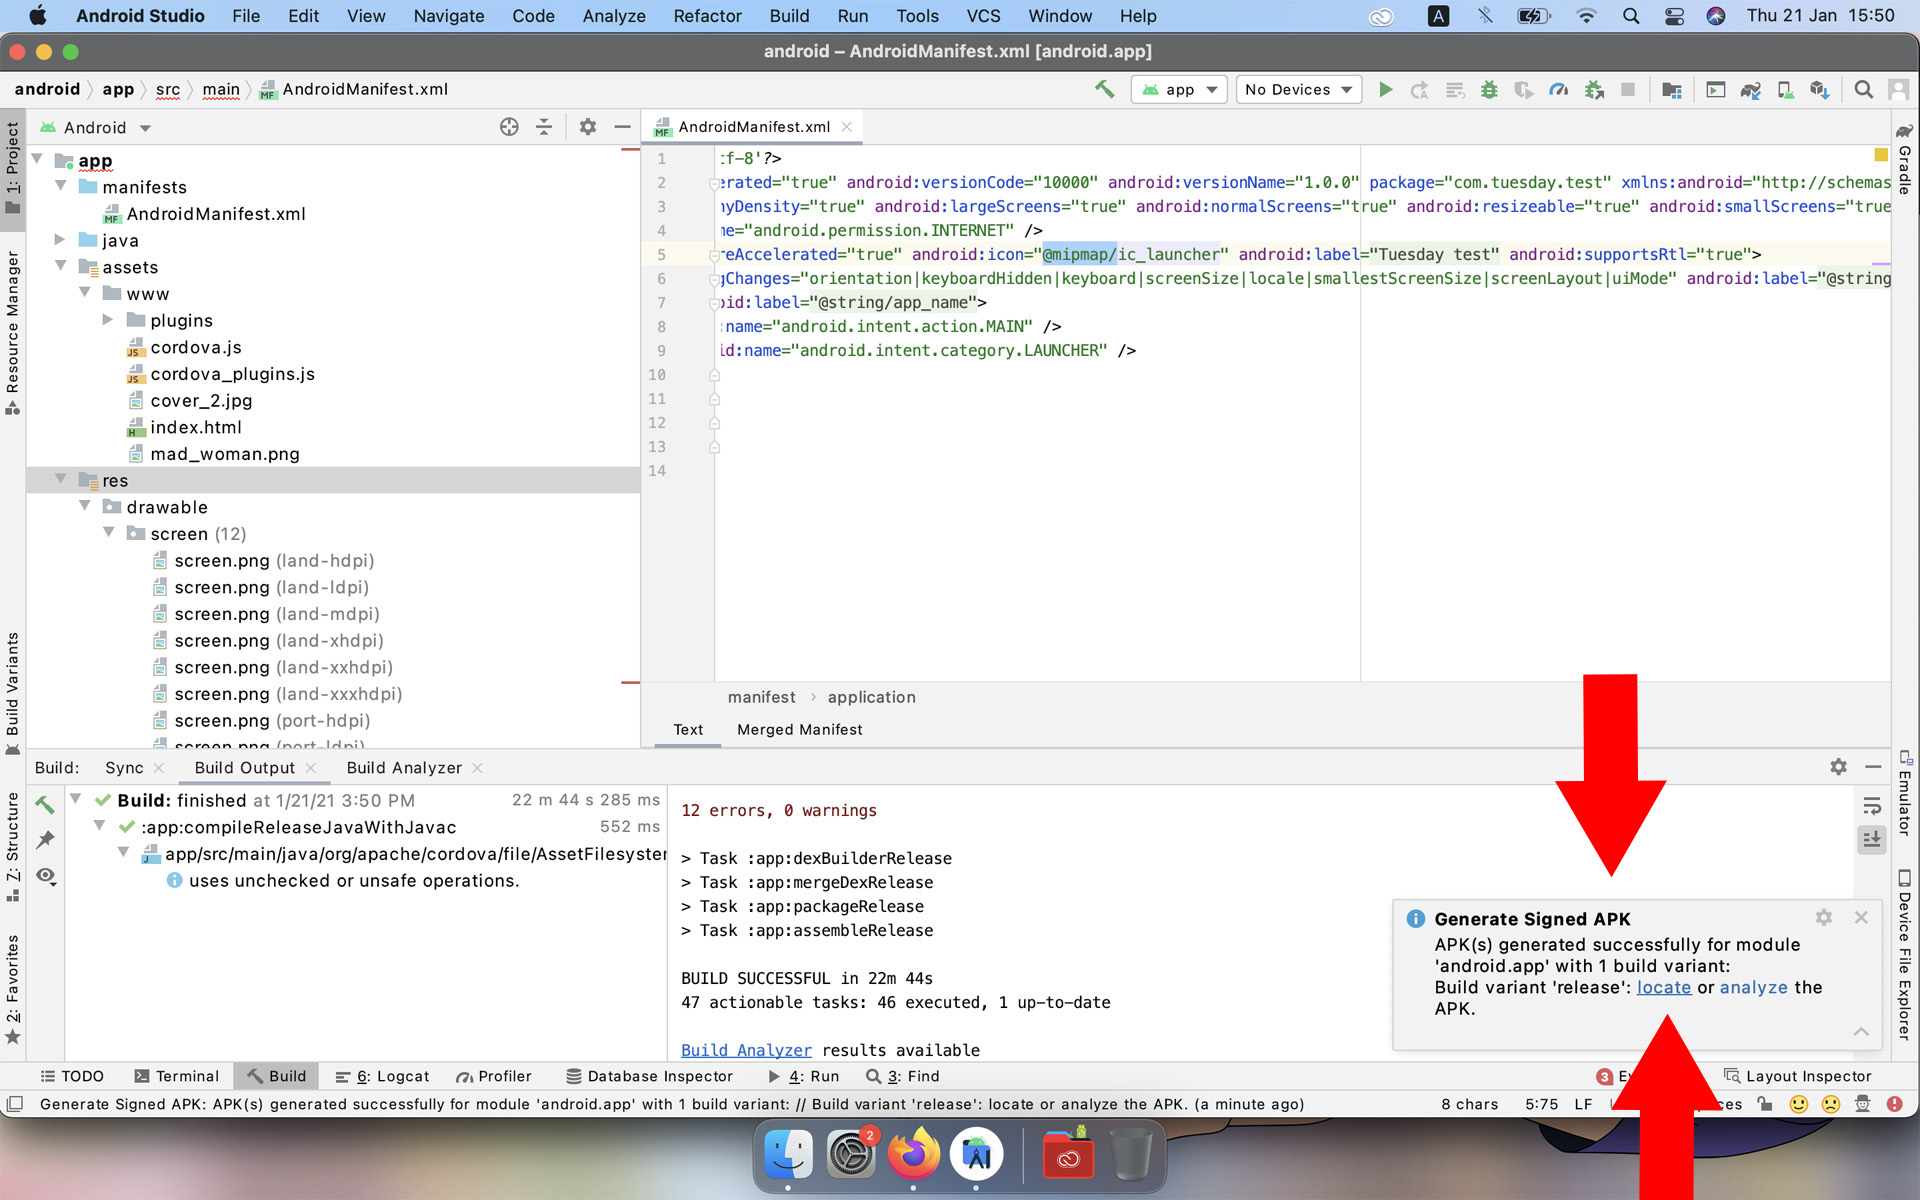
During the build of apk Android studio, you may need to download or update something, so it is advisable to have the Internet, otherwise Android studio will give an error. Fortunately, Android studio's internet connection is not often required and can work offline.
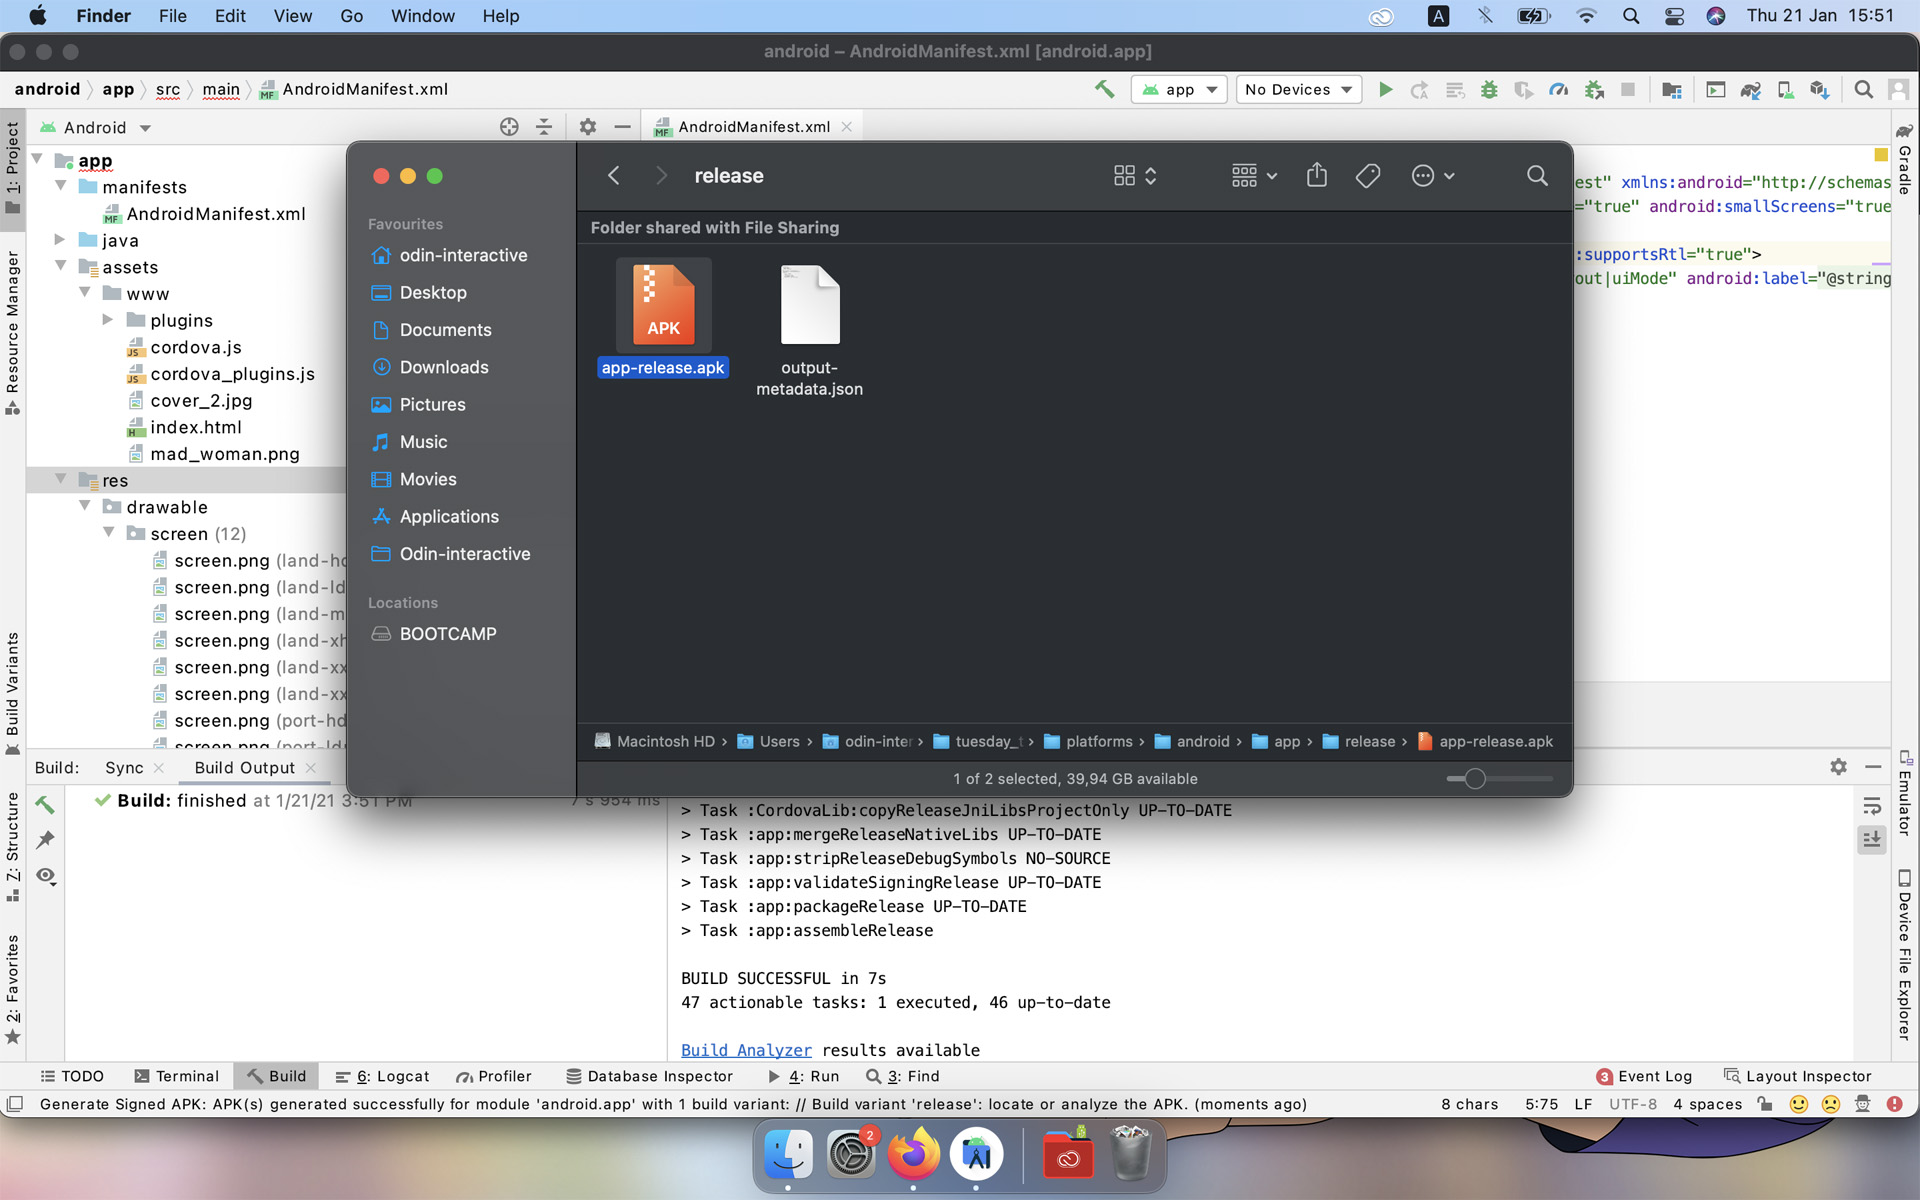
When the build is complete, a message will appear in the lower right corner with the location of the created apk.
Now everything is ready and you can upload this apk to GooglePlay or any other android app store.
I have used this method of creating applications very often. all my applications in Google Play are made just like that.
https://play.google.com/store/apps/dev?id=8196531474574430150
I might have missed something in this guide, if you fail, let me know.
When I get the chance, I'll show you how to make an iOS app.
Leave a comment
Log in with itch.io to leave a comment.